
Can I tell you something embarrassing? For years I just left the potato bag on the floor by the stove. Ten pounds of potatoes in a plastic grocery bag, sitting right there where everyone could see it. Not exactly the kitchen aesthetic I was going for.
The problem is that potatoes, onions, and garlic all need to breathe – they can’t go in closed containers or the fridge – and I could never figure out what to do with them that didn’t look like a mess.
Then I started seeing produce baskets made from burlap online and realized I could sew my own to match my kitchen.
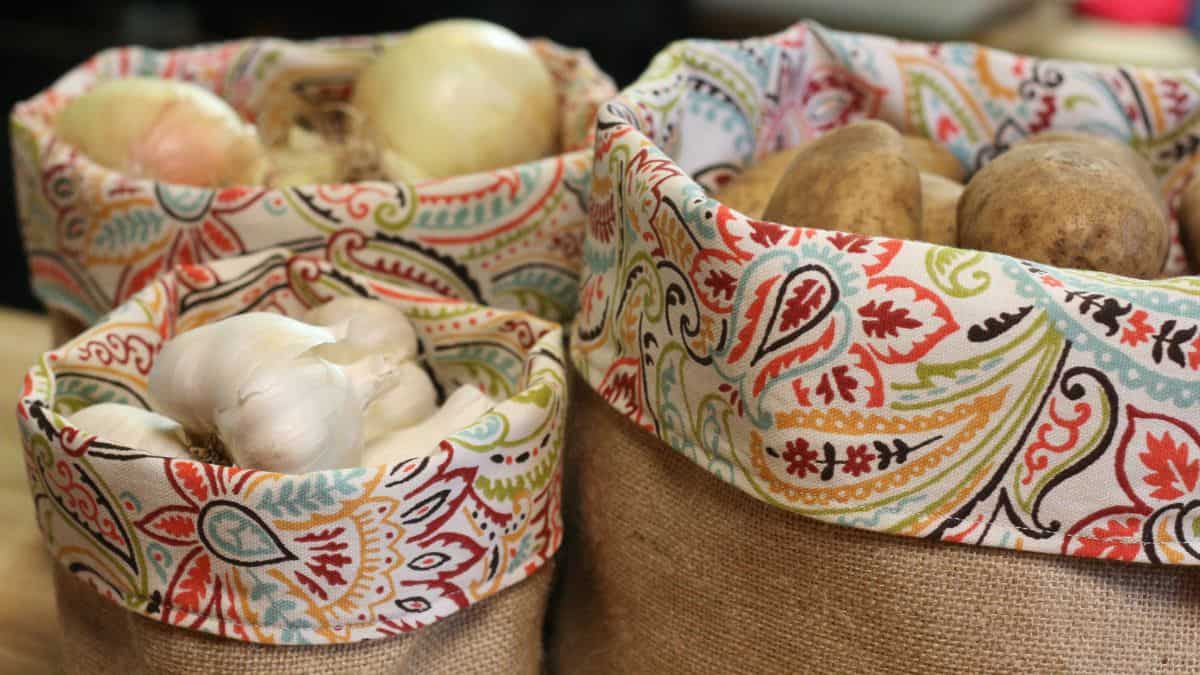
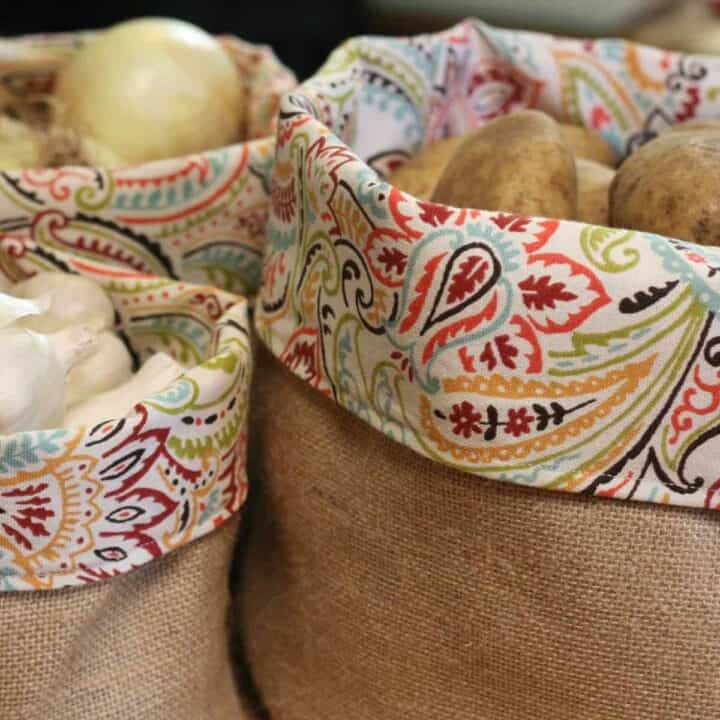
This tutorial shows you how to make a lined burlap produce basket with a fabric lining that you choose. The burlap provides the airflow that produce needs; the fabric lining lets you customize the look to match your kitchen. We make ours in three sizes — one for potatoes, one for onions, and a smaller one for garlic — and they’ve been on our kitchen counter ever since.
What Makes These Fabric Produce Baskets So Worth Making
- Burlap naturally allows airflow around produce, which is exactly what potatoes, onions, and garlic need to stay fresh longer than they would in a sealed container.
- The fabric lining is completely customizable — use whatever print or color matches your kitchen, and change it out if you ever redecorate.
- Making three baskets — one each for potatoes, onions, and garlic — keeps your counter organized and actually looks intentional instead of messy.
- This is a beginner-friendly sewing project. If you can sew a straight seam and a zig zag, you can make these.
Materials and Cut Dimensions
You’ll need approximately 1 yard each of burlap and coordinating fabric. These dimensions make one basket sized for 10–12 pounds of potatoes. Scale up or down as needed.
| Piece | Large Potatoes (~12 lbs) |
Medium Onions |
Small Garlic |
Material |
|---|---|---|---|---|
| Bottom oval | 13" x 10" | 10" x 7.25" | 8.25" x 5" | Burlap + lining fabric |
| Side panel | 36" W x 12" H | 26.5" W x 10" H | 20" W x 8" H | Burlap + lining fabric |
| Approx. fabric needed | 1 yard each | 3/4 yard each | 1/2 yard each | Burlap + lining fabric |
Supplies:
- 1 yard stiff, tightly woven burlap (see tips below on burlap selection)
- 1 yard coordinating fabric
- Heavy duty thread
- Universal needle (no special needle needed)
- Oval platter approximately 13″ x 10″ for tracing the bottom
- Sharpie or fabric marker
- Pins
- Scissors or rotary cutter
Skip the Measuring and Get Straight to Sewing
Instead of drafting your own pattern, grab this printable version for just $2.97. All three sizes — large, medium, and small — are ready to print, tape, and cut. True-scale oval templates, cut dimensions, materials list, and step-by-step instructions included.
Instant download. Print at home on standard letter paper.
How to Make a Fabric Produce Basket
The first thing you need to do is find an oval platter, burlap and some fabric you only need about a yard of burlap and a yard of fabric. My platter measured 13″ across and 10″ wide. I just turned the platter over on the burlap and fabric and traced the oval. Then I cut them out and measured all around the outside to get my length for the sides. My length was 36″ and I decided to make it 12″ high. I cut the rectangle for the sides out of burlap and fabric that measured 12″ X 36″.

So, I had two ovals, and two rectangles. Take the burlap rectangle and fold it over so that the short sides of the rectangle match. Stitch a straight seam. Since burlap frays quite easily, I also ziz zagged the edge and then sewed a second straight seam. Now you have a tube.

Open one side of the tube (this will be the bottom of the basket) and pin the burlap oval onto the tube (like in the photo above).

Now, stitch a quarter inch seam all around the oval. When you are done, go back an zig zag and then do a second straight stitch. Now you have a bucket.

You are doing to do the exact same thing for your fabric. Make sure to keep right sides together (I didn’t have enough fabric left over from making pillows for the bottom so I used some drop cloth fabric from our stockings as the bottom which is why my fabrics don’t match in the photo.) Also, leave about a 6″ hole in one side of the seam. This is how you are going to turn it right side out.

Next, turn the burlap basket right side out and put it inside the fabric one. Pin all around the top and then sew them together. I used a 1/4″ seam and then I zig zagged.

Once the top is sewn, pull the burlap part out through the hole.

Pin the hole closed and sew it shut.

I just did it on the machine, but you can do it by hand if you want to.

Push the lining into the burlap basket and pin all around the top, making sure the seam is how it is supposed to be.

Top stitch all around the top. This will give your baskets a nice, tidy edge. You don’t have to to this part, but I always top stitch.

Turn the top down and fill with potatoes. This bag has 12 pound of potatoes in it.

Then make more for the onions and garlic to not only un-gross your kitchen but to actually make it a little more cute. Use the dimensions in the table above.
Tips for Making Burlap Produce Baskets
Choose stiff burlap. Not all burlap is the same. Loosely woven burlap is too floppy and the basket won’t hold its shape. Look for tightly woven, stiff burlap. You’ll feel the difference immediately. If yours turns out floppy, that’s the culprit.
Double-stitch all burlap seams. Burlap frays. Every seam on the burlap pieces should be: one straight stitch, one zig zag, one second straight stitch. This is what keeps your basket from falling apart at the seams with regular use.
No special needle needed. A standard universal needle works fine for burlap. You’ll want to open your machine and blow it out with canned air after sewing with burlap…it sheds more than regular fabric.
Don’t store potatoes and onions together. A reader shared this tip in the comments and it’s useful: gas from onions causes potatoes to sprout faster. Make separate baskets for each and keep them a few inches apart on the counter.
Keep potatoes out of direct sunlight. Sunlight can cause potatoes to turn green, which makes them bitter and can cause digestive issues. Keep your potato basket in a spot that gets indirect light at most.
Alternate fabric options: Burlap provides good natural airflow, which is why it’s ideal for produce. A reader used dark landscape fabric on the outside with canvas for the inner lining…the dark color also helps protect potatoes from light. Another reader added small grommets to canvas for additional airflow. Both are great adaptations.
Old coffee sacks work too. If you have access to coffee bean sacks (from a local roastery or coffee shop), they work beautifully as a substitute for burlap and have a wonderful look.
Make them in different sizes. The dimensions in this tutorial make a basket that holds 10-12 pounds of potatoes. For onions, a slightly shorter basket (about 9″ high instead of 12″) works well. For garlic, I make a small basket about 6″ high.
Sew a Fabric Basket
A beginner-friendly sewing project that's as practical as it is pretty. If you can sew a straight seam and a zig zag, you can make these fabric baskets.
Materials
- 1 yard stiff, tightly woven burlap (see tips below on burlap selection)
- 1 yard coordinating fabric
Tools
- Sewing machine
- Heavy duty thread
- Universal needle (no special needle needed)
- Oval platter approximately 13" x 10" for tracing the bottom
- Sharpie or fabric marker
- Pins
- Scissors or rotary cutter
Instructions
- Trace and cut your pieces.
Turn your oval platter upside down on the burlap and trace around it with a Sharpie. Cut out two ovals — one from burlap, one from your fabric lining. Then cut two rectangles measuring 12" x 36" — one from burlap, one from fabric. - Make the burlap tube.
Fold the burlap rectangle so the short ends meet, right sides together. Stitch a straight seam along the short end, then zig zag the raw edge, then stitch a second straight seam. This double-stitching is important with burlap because it frays easily. You now have a burlap tube. - Attach the burlap oval bottom.
Open one end of the tube (this is the bottom). Pin the burlap oval around the opening, easing it in as you go — it doesn't have to be perfect. Stitch a ¼" seam all the way around, then zig zag and stitch a second straight seam. You now have a burlap bucket - Make the fabric lining.
Repeat Steps 2 and 3 with your fabric pieces. Important: leave a 6" gap in one side seam of the fabric rectangle — you'll need this to turn everything right side out. Keep right sides together throughout. - Join the burlap and lining.
Turn the burlap basket right side out. Place it inside the fabric lining (which is still wrong side out), so right sides are facing each other. Align the top edges and pin all the way around. Stitch a ¼" seam around the top, then zig zag. - Turn right side out.
Pull the burlap basket out through the 6" gap you left in the lining. It will be awkward — just keep pulling. Once turned, pin the gap closed and stitch it shut on the machine or by hand. - Push lining inside and top stitch.
Push the fabric lining down inside the burlap basket. Pin all around the top edge, making sure the seam sits right at the top. Top stitch all the way around the top. This gives the basket a clean, finished edge and holds the lining in place. - Fold down the top and fill.
Fold the top edge down by about 2–3 inches, fill with produce, and you're done.
Frequently Asked Questions
Burlap is ideal for produce storage because it’s naturally breathable and allows airflow around vegetables, which helps them last longer. The key is choosing stiff, tightly woven burlap as loosely woven burlap is too floppy to hold its shape. The fabric lining is purely decorative and can be any cotton print or canvas you like. Other breathable outer fabric options include canvas with grommets added for airflow, dark landscape fabric, or repurposed coffee sacks.
Potatoes need cool temperatures, darkness, and airflow. A burlap basket keeps air circulating around them, which is better than a closed container or plastic bag. Keep them away from direct sunlight and away from onions as the gas that onions emit causes potatoes to sprout faster. Don’t store potatoes in the refrigerator; the cold converts their starch to sugar and affects the flavor and texture when cooked.
It’s better not to. Onions release a gas as they age that causes potatoes to sprout more quickly. Make separate baskets and keep them a few inches apart on the counter or in different areas of your kitchen.
No – a standard universal needle works fine for burlap. The main things to know: double-stitch all your seams (straight stitch, zig zag, straight stitch again) because burlap frays, don’t pull or tug the burlap while sewing since it stretches, and clean out your sewing machine afterward since burlap sheds more than regular fabric.
Yes – burlap is ideal because of its natural airflow, but you can use canvas, duck cloth, or heavy cotton. If you use a non-breathable outer fabric, add small grommets or air holes to allow airflow, especially for potato storage. The lining fabric can be anything you like since it’s on the inside.
The dimensions in this tutorial (a 13″ x 10″ oval bottom with 12″ sides) hold about 10-12 pounds of potatoes. If you go through potatoes quickly and buy in larger quantities, you could scale up by tracing a larger platter. For a smaller household, a 10″ x 8″ oval with 10″ sides holds about 5-6 pounds.
Hand washing in cold water is the safest option as burlap can shrink and distort in a washing machine, especially if it’s not pre-washed before you sew. Spot clean as needed and let it air dry completely before refilling with produce. The fabric lining can usually tolerate gentle machine washing if you remove it, but it’s easier to just hand wash the whole basket together.

Angi Schneider is the author of The Ultimate Guide to Preserving Vegetables and Pressure Canning for Beginners and Beyond, both published by Page Street Publishing. She has taught canning classes for 177 Milk Street, been featured in Serious Eats, and written for Countryside Magazine. Angi has been sharing gardening, preserving, and simple living skills since 2010.
Very cool, Angie! I’m going to have to show this to my wife and ask her to make us some! Love them!!
Thanks Patrick! I’d love to see the ones she makes!
These are adorable! Mind if I include her in my homestead kids in business post? If it’s ok, do you need me to send you another questionnaire?
Of course you can. I still have the questionnaire I’ll put it on my to-do list for today 😉
Just take care that your kitchen is not too bright. Sunlight will turn potatoes green – and poisonous! Maybe a cloth flap cover for the potato bin?
Thanks for the tip! I know direct sunlight will do that when they growing or drying out, but I’ve never had it happen in my kitchen.
What a great idea!
I have mine in a giant bowl, but I really like the bags. Looks like I’ll have to get some burlap.
We’ve been in our home over 16 years and I’ve always just plopped the potato bag right by the stove/oven, too….until, I noticed that if I plop it right around the corner in the utility room, there’s less light….I did that after reading about the light tip and wanted to avoid green potatoes. (We’ve never had much of a problem since we scarf them down rather quickly.) BUT! How cute are these produce baskets!?! I’m so thankful that I’m following closely behind you on your adventures. Your posts are so frequently and answer to a question, or a prayer!
Blessings!
That’s funny, Becca. I’m glad I’m not the only one who just plops the bag on the floor. But no more!
So lovely, can’t wait to make a few with my little girl. Thanks for sharing!
You’re so welcome! I’d love to see the ones you make with your little girl.
this is co clever and handy and….pretty all bagged together – wink! great idea indeed!
Hugs
Thanks Kristeen.
Yay! I have my bag on top of the fridge and everyone asks about the ‘ugly’ bag. Great idea!
ha! We used to keep them on the fridge but years ago one fell behind the fridge and rotted….ugh, we thought it was a dead mouse it smelled so bad.
Uber gross!!! I never thought about that possibility, thanks for the warning!
I only shared because we’re friends 😉
Great Idea Love the Bags Thanks for sharing….. Just a note on the lids to the pickle jars…… I reuse both the 1/2 and 1 gallon size…use steel wool to ruff up the surface of lids and spray paint and then use chalkboard peel and stick labels…… Never know they were pickle jars…. I used the hammered bronze on mine 🙂
Thanks for the idea! I tried spray painting one of the lids but it’s coming off, so I didn’t bother with the others. Makes sense to ruff up the surface first. 😉
We grow our own potatoes and store in extra refrigerator…120 pounds this year. To keep some handy for cooking, I fill a clay flower pot to the back of the lower shelf of the frig. In the kitchen. The smaller or knobby ones get cooked with skins in in water till tender. Drain and store in frig for potato salad, fried potatoes, etc. handy and ready for quick meal.
I love the burlap bags. Washable too. A shorter one would be nice for fruit and veges kept for use on the counter!
oh, I hope I can grow that many potatoes one day!! I love keeping some cooked potatoes in the frig, too, they make a great snack.
Love these! I will have to make some. Both potatoes and onions should be stored where they can breath so the burlap is perfect. Just don’t store them next to each other. Gas from the onions cause the potatoes to sprout. I would never store potatoes in the fridge. It turns the starch into sugar. When I get a good crop from the garden, I store them in cheap styrofoam coolers in a cool spot in the basement. I wish I had the root cellar my dad had. Maybe some day.
oh, a root cellar would be lovely! We live too close to sea level but I’ve always wanted one.
Potentially silly question…is the burlap mostly for looks? Or is it better than a sturdy fabric? I understand it’s good to have some airflow; just wondering if some of my thicker fabrics would also work. Or even any cotton fabric if interfacing is used?
That’s not silly at all. I used burlap just because I thought it looked nice for the project, you can use whatever fabric you want. But you probably do want some airflow depending on what you are going to use them for. I’d love to see the combos you come up with!
Thanks for the tutorial!
<3
This is very clever to make produce baskets from burlap and fabric! I love the rustic look of burlap. Thanks for submitting your tutorial post to DIY Crush! I just published it.
Thanks Denise!
These are gorgeous! I can’t wait to make some!! Thanks for sharing!
You’re so welcome! I’d love to see what you make, feel free to post them on my fb page if you want (http://facebook.com/schneiderpeeps)
I made these with dark brown landscape fabric- the dark color also helps preserve the potatoes. It’s breathable fabric -which is what the burlap accomplishes. I used heavy canvas for the outside with vents- you can do that with randomly spaced small grommets or you can just make some button holes on the canvas before sewing the bucket- don’t forget to slit them open- yup- I forgot. I also put a short drawstring around the top to keep it closed to keep the light out.
That’s a great idea, Kim. Thanks so much for sharing.
Such a good idea and I can’t wait to try, I have some old coffee sacks ready for such a project.
Did you need a special needle on your machine? And did the burlap shed lots of stuff into the machine?
The burlap does shed some but not tons. I usually open my machine and use canned air to dust it out after sewing with burlap. No, I didn’t use a special needle, just a universal needle. Be sure to zig zag the seams to keep the burlap from fraying as you use the baskets.