Every summer, the Texas rural roads are full of grapevines that cover fences and trees. The wild grapes are either mustang grapes or muscadine grapes. That’s the sign that it’s grape juice season!
This recipe was reviewed for accuracy and food safety by Angi Schneider in April 2026. All processing times and methods follow tested guidelines from the USDA and the National Center for Home Food Preservation (NCHFP).
And while they aren’t technically the same thing, they do taste similar, with mustang grapes being more tart and having more tannins. They are also treated the same (as are all grapes) when it comes to preserving them.
So, don’t get too caught up on calling the wild grapes by the correct name.


Mustang Grapes or Muscadine Grapes?
Around here, mustang grapes and muscadine grapes grow along the same fence lines and up the same trees, and most people use the names interchangeably. I’ll be honest — I usually let it go. Life is too short to correct someone who just handed you a jar of homemade jelly. But they are two different plants, and when you’re foraging it helps to know what you’re looking at.
The quickest way to tell them apart is to flip a leaf over. Mustang grape leaves are green on top but gray and fuzzy on the underside — that fuzziness is the giveaway. Muscadine leaves are green and smooth on both sides. Once you know what to look for you’ll spot the difference immediately.
The fruit of both looks similar at first glance — dark blue, almost black, with a thick skin. But bite into them and you’ll notice right away that they’re not the same. Muscadine grapes are sweet. Mustang grapes are intensely tart and acidic, enough to make your eyes water if you eat one straight off the vine.
For juice, that tartness is actually exactly what you want. It gives the finished juice a bold, bright flavor that store-bought grape juice simply doesn’t have. I’m not particular about mixing varieties — whatever wild grapes we can find go into the pot together, and the juice is always wonderful.
Gathering Wild Grapes
Once you find wild grapes, be sure to get permission from the property owner before foraging. Around here, people don’t usually care if you pick from their pasture fences that are long the roadside without permission. But if you can get permission, it would be better than risking it.
Mustang grapes have a lot of tannins in them which can make the skin itch. So, wear gloves and long sleeves. The areas where wild grapes grow is usually overgrown, so be sure to wear long pants and boots. If you don’t have boots, tuck your pants hem into your socks.
Bring buckets, garden sippers, and water to keep cool.

Juicing Wild Grapes
When you get home, you’ll want to give the grapes a quick rinse. I just fill the buckets with water and then strain it out.
The absolute easiest way to juice grapes is with a steam juicer. Now, it’s not necessary and I’ll show you how we juiced grapes for about 20 years before getting a steam juicer. However, if you have a lot of grapes to do, I highly recommend this one.
- Start by washing the grapes well — mustang grapes are foraged, not grocery store fruit, so give them a good rinse. Pull them off the stems and drop them into a large stockpot with about an inch of water in the bottom. Don’t worry about being too precise here; you just need enough water to keep the grapes from scorching before they release their juice.
- Put the lid on the pot and heat it over medium heat. As the grapes warm up and start to soften, use a potato masher to crush them down — this helps them release their juice faster and more completely. Stir occasionally so nothing sticks to the bottom. Keep going until everything is cooked through and you’ve got what looks like a thick, deep purple soup. Then turn off the heat and let it cool until you can handle it comfortably.
- Strain out the solids. I do this in stages rather than trying to get perfectly clear juice in one pass. The first straining is just about getting the big solids out — I’ll pour the cooked grapes through a colander set over a large bowl, or use one of my vintage metal strainers. Whatever you have that catches the skins, seeds, and stems works fine at this stage.
- Strain the juice again through a jelly bag strainer. For an even clearer result I’ll sometimes hold a fine mesh strainer over the jelly bag and do a double strain. Old clean pantyhose work surprisingly well too if you don’t have a jelly bag.
- Put the strained juice in the refrigerator for 24-48 hours, to let any remaining solids settle to the bottom.
- The next day, without mixing, pout out the clear juice and discard the sediment. You can even use a paper coffee filter to get even a clearer juice.
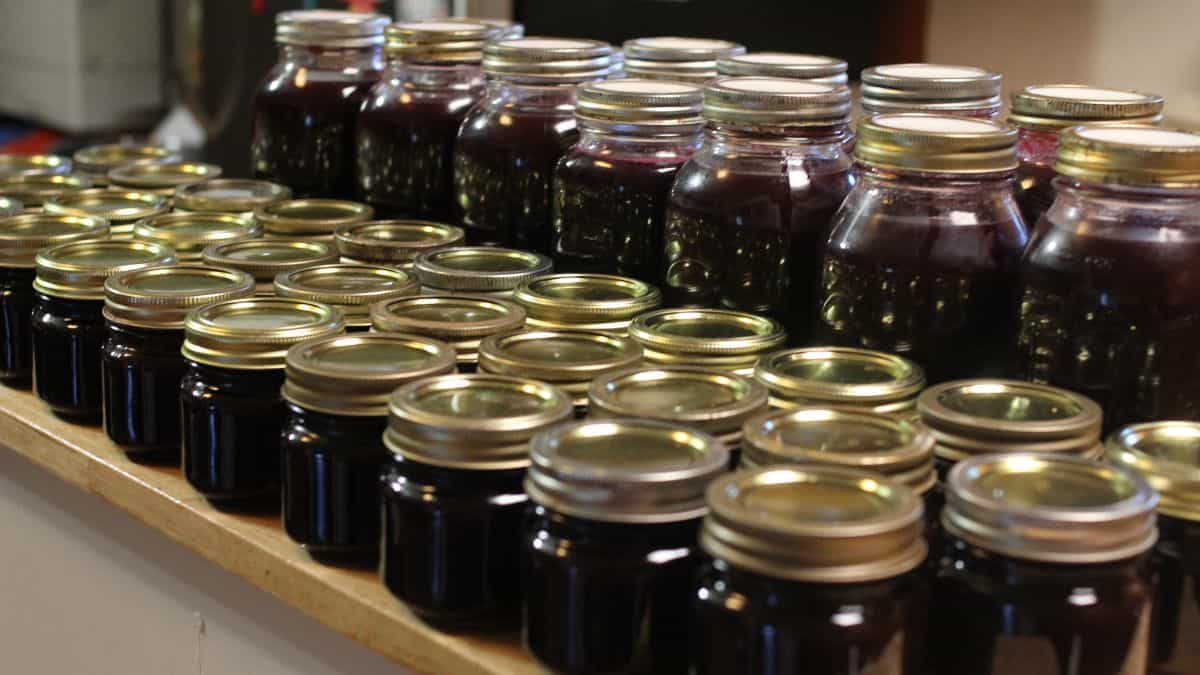
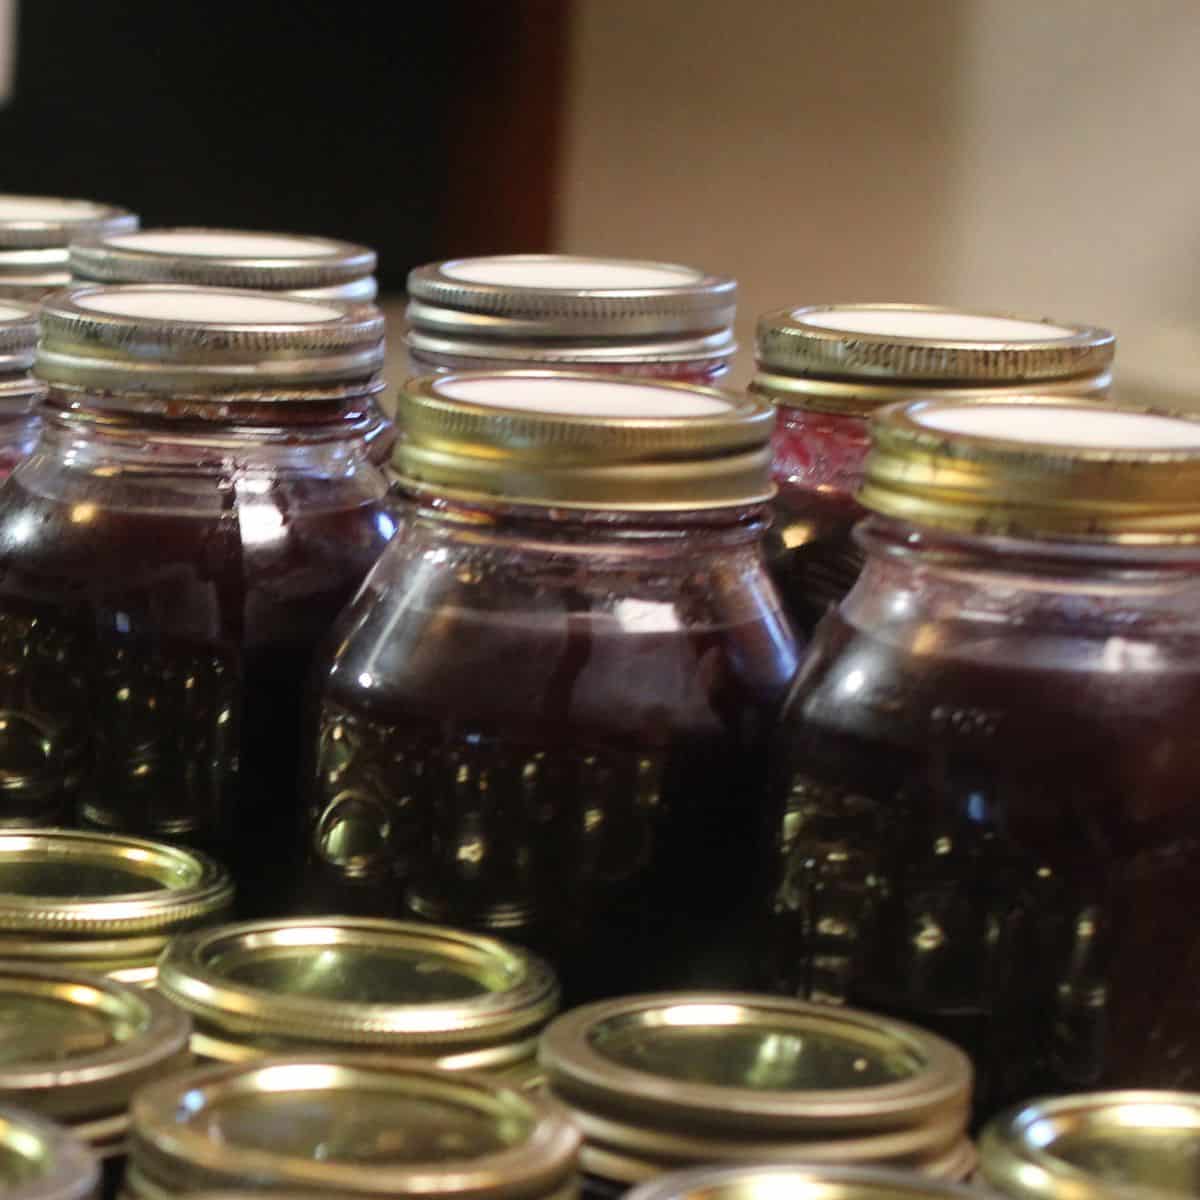
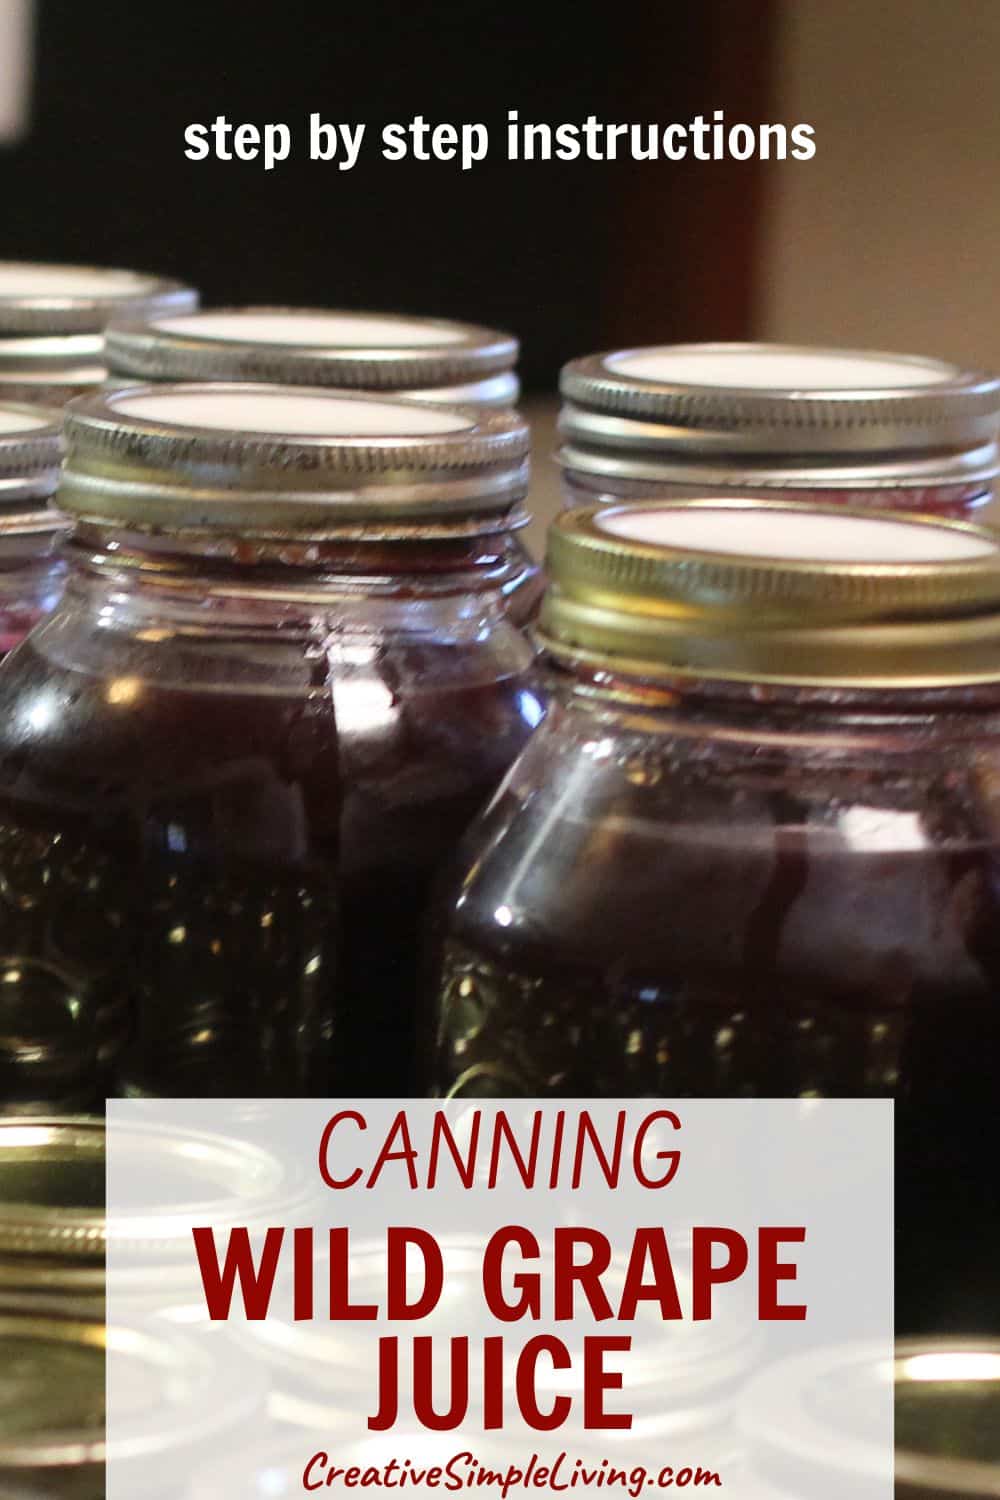
- It’s now ready to can or to be made into wild grape jelly.
This is genuinely the most time-consuming step in the whole process. If your week is busy and you can’t get to all the steps, put the juice in the freezer — just leave headspace in the jars. Here are some tips for freezing in glass containers, if you’re using mason jars or other glass containers. You’ll have to thaw the juice before canning it.

Canning Mustang Grape Juice
The first time I canned mustang grape juice was simply because we had harvested too many grapes and had way more grape juice than we needed for jelly making. I wasn’t sure how we would use it because mustang grape juice is pretty tart even with sugar added. But we found that we really like it added to club soda for a treat.
- Put the strained juice in a large stockpot.
- Add one cup of sugar for every quart of wild grape juice. You can taste this once the sugar has dissolved and if it’s not sweet enough for your family, add more sugar.
- Bring to a boil.
- While the juice is heating up, prepare the jars, lids, rings and water bath canner by washing them in hot soapy water. Fill the canner about half full of hot water and put it on the stove. Put the washed jars in the canner to stay warm. Set the washed lids and rings aside to use later.
- Turn the heat under the water bath canner to medium to keep the jars hot. The water should not boil, just be hot. The jars do not need to be sterilized if you process the juice for at least 10 minutes.
- Once the juice begins to boil, turn off the heat.
- Working with one jar at a time, fill the canning jars and leave 1/4-inch headspace.
- Wipe the rim, add the lid and put the ring on fingertip tight – as you would a mayonnaise jar lid (don’t crank it down)
- Put the jar back into the water bath canner and fill the next jar.
- Once all the jars are filled, put the lid on the canner and turn the heat up. The water should be 1 to 2-inches above the jars. If it’s not, add more hot water to the canner.
- Process for 5 minutes for pints and quarts and 10 minutes for half gallons.(see note below) Start timing after the water reaches a rolling boil. Adjust processing time for altitude, if necessary (see chart below)
- When the time is up, turn off the heat, remove the canner lid and let the jars sit in the canner for 5 minutes.
- Using a jar lifter, remove the jars from the water bath canner and put them on a towel on the counter.
- Let the jars cool for 12-24 hours before touching them.
- Remove the rings and check the seals. If any jar didn’t seal, put the ring back on and put it in the refrigerator to use first.
- With a clean, damp cloth clean the jars to remove any residue.
- Label the jars and store in a cool, dark place.
Note about processing time for grape juice: Pints and quart jars of grape juice can be processed for 5 minutes, however, you will need to sterilize the jars ahead of time. To sterilize the jars, they need to be boiled for 10 (time starting after boiling starts). Since there is no safety or quality issue with increasing the processing to to 10 minutes, I recommend just processing the filled jars for 10 minutes to avoid having to sterilize the jars.
| Style of Pack | Jar Size | Elevation (feet) | Processing Time (minutes, boiling-water canner) |
|---|---|---|---|
| Hot pack | Pints & Quarts | 0 – 1,000 ft | 5 minutes |
| Hot pack | Pints & Quarts | 1,001 – 6,000 ft | 10 minutes |
| Hot pack | Pints & Quarts | Above 6,000 ft | 15 minutes |
| Hot pack | Half Gallons | 0 – 1,000 ft | 10 minutes |
| Hot pack | Half Gallons | 1,001 – 6,000 ft | 15 minutes |
| Hot pack | Half Gallons | Above 6,000 ft | 20 minutes |
Ingredients
Method
- Wash grapes and remove them from the stems.
- Place grapes in a saucepan, crush and add just enough boiling water to cover the the bottom of the pan to keep the grapes from sticking.
- Heat to simmering and simmer slowly until skin is soft, about 10 minutes. Gently mash the grapes to help them release the juice.
- Turn off the heat and let the grapes cool enough to handle.
- Strain through a damp jelly bag or double layers of cheesecloth. Refrigerate juice for 24 to 48 hours.
- Wash the jars, lids, rings and canner in hot, soapy water. Fill the water bath canner about half way with water and put the jars in it to keep them warm. Set the lids and rings aside.
- Without mixing, pour off the clear juice into a stockpot and discard the sediment.
- Add sugar to the grape juice and heat until sugar dissolves. Bring to a boil.
- Once the juice is boiling, remove it from the heat and fill the hot jars.
- Wipe the rims with a clean damp rag and put lids and rings on the jars.
- Put the filled jars back into the water bath canner and bring it to a boil and process for 10 minutes – adjusting for altitude if necessary (see notes below)The water should be 1 to 2-inches above the jars. If it's not, add more hot water to the canner.
- After they’ve processed for 10 minutes remove the jars from the canner and put them on a towel on the counter to cool.
- Let them completely cool then remove the lids and check the seals. If any didn't seal put them in the refrigerator to use first. Clean the sealed jars with a damp cloth. Label and store the jars in a cool, dark place. .
Notes
Tried this recipe?
Let us know how it was!What to do with the leftover grape mash
There is a lot of pulp (or mash) leftover when you make grape juice. You can salvage it by running it through a food mill and removing all the seeds and skin.
We like to make grape pie and grape jam with the leftover mash.
Anything left after that can be composted.
Frequently Asked Questions
Absolutely — the process is identical for any wild grape, and muscadine and mustang grapes are interchangeable here. The main difference you’ll notice is that muscadine juice is a bit sweeter and less tart than mustang grape juice. If you’re using muscadines you may want to taste the juice before adding the full cup of sugar per quart and adjust down slightly if it’s already sweet enough for your family.
No — sugar is optional and is added for flavor and to help retain the color only, not safety. The acidity of wild grape juice is what makes it safe for water bath canning, not the sugar. That said, mustang grape juice is intensely tart without any sweetener, so most people find at least some sugar necessary to make it pleasant to drink. Start with the recommended amount and adjust to taste.
Refrigerating the strained juice allows the tartrate crystals and any remaining sediment to settle to the bottom of the container. When you pour off the clear juice without disturbing the sediment, you end up with a much cleaner, clearer finished product in the jar. It’s an extra step but it makes a noticeable difference in both appearance and flavor.
You can, but your juice will be cloudier and may have more sediment in the finished jars. It’s perfectly safe either way — just an aesthetic difference. If you’re short on time, strain the juice as thoroughly as possible through a fine mesh strainer or jelly bag and proceed straight to canning.
The larger the jar, the longer it takes for heat to penetrate to the center, which is why half gallons require a longer processing time — 10 minutes at sea level versus 5 minutes for pints and quarts. Since I recommend processing pints and quarts for 10 minutes anyway to avoid the extra step of pre-sterilizing jars, in practice the only jar size that’s different is the half gallon at 10 minutes minimum.
Yes, but use it as a water bath canner — fill it with enough water to cover the jars by 1 to 2 inches, do not lock the lid, and process with the vent open. Grape juice is high-acid and doesn’t require the higher temperatures of pressure canning. Using it as a pressure canner would over-process the juice and affect the flavor and color.
It varies depending on how ripe and juicy the grapes are, but a rough estimate is about 3/4 to 1 cup of juice per pound of grapes. The recipe uses approximately 25 pounds of grapes to yield 6 quarts of finished juice. If you have fewer grapes, just scale down proportionally — this recipe works in any quantity.
Don’t throw it out — there’s a lot of flavor left in that pulp. Run it through a food mill to remove the seeds and skins, and you’ll have grape must that can be used for grape jam or grape pie filling. Whatever’s left after that can go straight into the compost.
Our favorite way is to add a splash — about a quarter cup — to sparkling water for an afternoon treat. It’s intensely flavored so a little goes a long way. You can also use it as a base for homemade grape jelly if you run out of fresh grapes mid-season, add it to smoothies, or heat it with a cinnamon stick for a warm winter drink.

Angi Schneider is the author of The Ultimate Guide to Preserving Vegetables and Pressure Canning for Beginners and Beyond, both published by Page Street Publishing. She has taught canning classes for 177 Milk Street, been featured in Serious Eats, and written for Countryside Magazine. Angi has been sharing gardening, preserving, and simple living skills since 2010.
Making and canning mustang grape juice is something we do every year.