


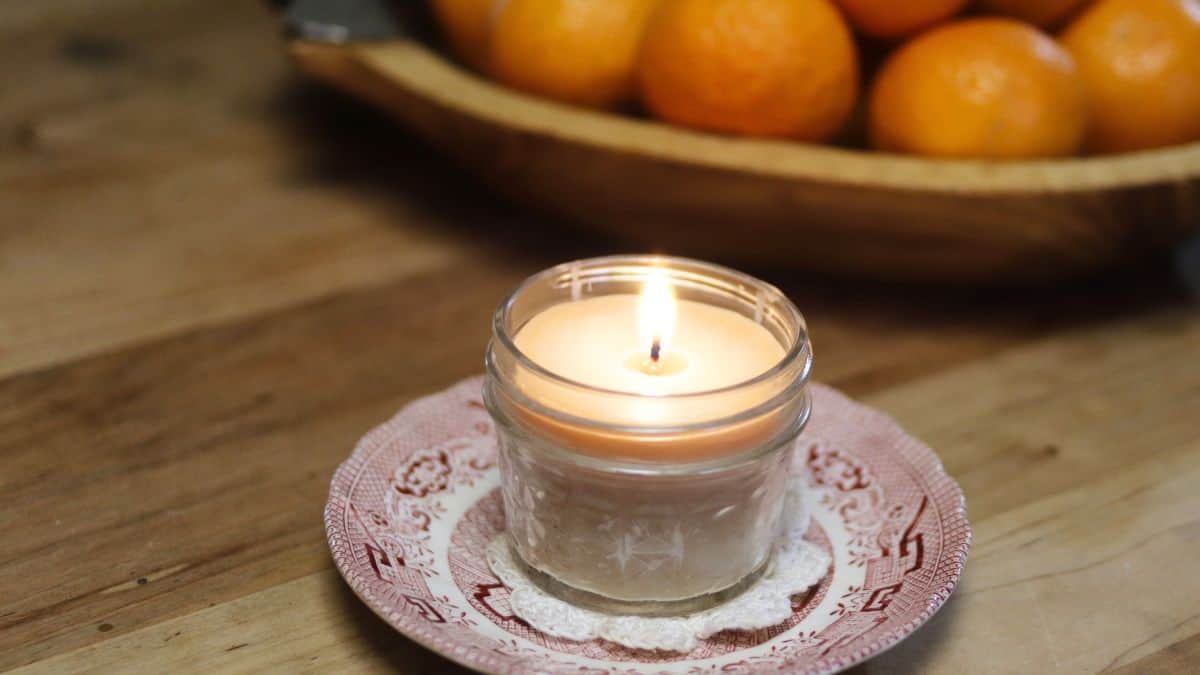
If you’ve burned 100% beeswax candles before you know that they can sometimes be hard and brittle and burn unevenly. As a beekeeper I love the idea of using just beeswax in our candles, but I’ve found that I get smoother, slower burning candles when I add some coconut oil to the mix.
Adding coconut oil to the beeswax will give you easier pours, better scent throw, and less tunneling. Of course there’s more to great candle making than just mixing beeswax and coconut oil and we’ll cover all those things in this tutorial. We’ll learn how to choose the right wick, what are the best containers, how to not make a huge mess in your kitchen…plus much more.
Why add coconut oil to beeswax candles?
Pure beeswax has a relatively high melting point, which makes it strong and slow-burning — perfect for tapers and pillars. But in smaller containers, that same firmness can cause tunneling (when the wax melts straight down the middle and leaves hard edges) or cracking as it cools.
Coconut oil lowers the melting point of the wax, creating a softer blend that:
- Burns more evenly in jars and smaller containers
- Improves scent throw when using essential oils
- Pours more smoothly and cools with fewer surface cracks
- Feels creamier to the touch — a small thing, but lovely if you gift them
It’s also an excellent option if you live in a cooler climate or tend to make candles in winter when beeswax sets faster.
The key is balance — too much oil can make your candle too soft and shorten burn time, while too little won’t make a noticeable difference. I’ll walk you through the best starting ratios and testing tips below so you can find the sweet spot for your setup.
| Feature | 100% Beeswax Candles | Beeswax + Coconut Oil Candles |
|---|---|---|
| Texture & Hardness | Firm, solid texture. Can feel brittle when cool. | Softer and smoother due to lowered melting point from coconut oil. |
| Melt Point | Higher melt point (warmer to the touch and hotter flame). | Lower melt point—pours and sets with a slightly softer surface. |
| Burn Characteristics | Clean, bright long burn; may tunnel in small jars or cool unevenly. | Burns more evenly in many small containers; reduced tunneling in certain sizes. |
| Scent Throw | Natural honey-like scent from beeswax; essential oils may be subtler. | Coconut oil can help disperse scent — slightly improved scent throw with essential oils. |
| Wick Choice | Often needs a stiffer, larger wick to handle hotter flame and firmer wax. | May allow a slightly smaller or softer wick because the wax is less hot; wick testing recommended. |
| Recommended Ratio | — | Common starting point: 4:1 beeswax to coconut oil (by weight). Adjust 5:1 to 3.5:1 for firmer or softer results. |
| Ideal Uses | Classic pillar-style candles, larger tapers, or when you want a very firm candle. | Container candles, smaller jars, or recipes where a softer finish and better scent throw are desired. |
| Appearance | Opaque, warm honey tone; can show frosting (natural bloom) over time. | Similar warm tone but slightly glossier surface; may show less visible frosting. |
| Pros | Very natural, long burn, no additives. | Softer texture, easier pour, improved scent diffusion, versatile for small jars. |
| Cons | Can be brittle, may crack/top-surface split in some containers, hotter flame. | Too much coconut oil can make a candle too soft or reduce burn time; requires careful ratio & wick testing. |
| Sourcing & Sustainability | Choose sustainably harvested beeswax from reputable beekeepers to support pollinators. | Prefer unrefined, responsibly-sourced coconut oil when possible; still choose sustainable beeswax. |
Choosing the Right Ratio of Beeswax to Coconut Oil
I always recommend starting with a 4:1 ratio (4 parts beeswax and 1 part coconut oil, by weight) to new candle makers. The printable how-to card below has this ratio.
Make a small batch, let it cure and then burn a couple of candles. If you think they burn too slowly and are tunneling, then add more coconut oil to the next batch. If you think they’re too soft and are burning too quickly, reduce the coconut oil in the next batch.
Ideally, the ratio should be 3.5:1 for softer candles and up to 5:1 for firmer candles.
You’ll want to keep notes on burn time, scent throw, and texture so when you get just the right ratio you can repeat it.

DIY Candle Making Supplies
Beeswax: The best place to get beeswax is from a local beekeeper which means it will probably be sold in blocks, not pellets. Blocks are just fine. Since you’ll be making candles based on weight you won’t need to grate the beeswax, just use 4 times the amount of beeswax as you do coconut oil. If you don’t know a local beekeeper Sperry Beeswax and Honey is a wonderful resource for sustainable beeswax.
Coconut oil: You should be able to find unrefined coconut oil at your local grocery store.
Candle wicks: Beeswax candles need a thicker wick that allows the be wax to be pulled up the wick and be burned as fuel. Otherwise the wick will burn but the candle will not (called tunnelling). Braided cotton wicks that are coated in beeswax is the most recommended wick for beeswax candles. Wooden wicks are also nice but you’ll need to ones that are thicker and made for beeswax candles. You might need to do a little wick testing before deciding which wick you like best.
Heat-safe containers or jars: You can use mason jars (ones without shoulders work best), re-use containers from store bought candles, metal tins also work well. While tea cup candles look pretty, they aren’t as heat-safe as the other containers and are not recommended.
Double boiler or heatproof pitcher: You can use a recycled metal can (like from canned vegetables) and a small pot of water to melt the wax. If you’re going to do a lot of candles, I recommended getting an electric wax-melter, it makes candle making much easier.
Thermometer and stirring utensil: A regular candy thermometer and long spoon are just fine. But you’ll want to use a dedicated thermometer and spoon to make clean-up easier.
Hot Glue Gun: It’s nice to glue the wicks to the jars so they stay in place. If you don’t have a hot glue gun, you can put some melted wax on the wick base and hold it in the jar for a while until it’s cooled off. You’ll run the risk of the wick moving but if you let the wick completely cool off, it should work just fine.
Wick Holder: Once the candle is poured the wax on the wick will melt a bit and might cause the wick to move. You can use a wick holder to keep it centered. There are metal wick holders and wooden wick holders on the market. You can also use clothes pins, chopsticks or craft sticks (tongue depressors) or a combination of them.

Step-by-Step: How to Make Beeswax Candles with Coconut Oil
- Measure and Melt: Weigh wax and coconut oil. Put them in a heat safe container and melt them over low heat. Use a double boiler or electric wax-melter.
- Prepare Containers: While the wax is melting, secure wicks to the containers. Be sure the wax holders are set aside to use as soon as the candles are poured.
- Add Essential Oils (optional): If you want to add some essential oils to the candles, add in just before pouring when the wax is 155–160°F. Stir gently to mix the scent throughout the wax.
- Pour & Cool: Once the wax and oil is completely melted, pour it into the containers. Be sure to pour slowly to avoid air bubbles; allow to set for at least 24 hours before burning.
- Trim & Burn: Trim the wick to ¼ inch and burn in 2–3 hour increments.


Testing and Adjusting Your Candle Recipe
Making candles is part art and part gentle science. Every wax blend, wick, and container will behave just a little differently — and that’s what makes homemade candles so satisfying.
Beeswax Candle Testing Protocol
- Make a Small Batch: Pour a few test candles (about 2–3 ounces each) using your chosen beeswax-to-coconut-oil ratio. Label each one with the ratio and wick type.
- Allow Candles to Cure: Let the candles sit for at least 24–48 hours at room temperature before lighting. This helps the wax and oils fully set.
- Trim the Wick: Before each burn, trim the wick to about ¼ inch to prevent excess smoke and uneven melting.
- First Burn Test: Light each test candle and allow it to burn for 1–2 hours. Observe how evenly the surface melts and how tall the flame is.
- Cooling Observation: After extinguishing, watch how the surface re-solidifies. A good balance will cool evenly without deep craters or cracks.
- Measure Burn Time: Track how long it takes each test candle to burn down by half. Softer waxes often burn faster.
- Adjust as Needed: If the flame is weak, try a larger wick. If it’s flickering or smoking, reduce the wick size or add a bit more beeswax for firmness.
- Document Results: Note wick size, wax ratio, scent performance, and appearance. Keep your best combination for future batches.
Tip: Candle testing is part science and part art—recording your results will help you consistently pour beautiful, clean-burning candles every time.
Once you’ve poured your first few candles, it’s time to test and take notes. Start small and change only one thing at a time — wick size, wax ratio, or container shape — so you can see exactly what makes the difference. A slightly thicker wick might solve tunneling, while a touch more coconut oil could soften the wax just enough for a perfect, even burn.
Keep a simple candle-making journal or notepad by your workspace. Record each test candle’s ratio, wick type, and any observations about how it burns. Over time, these notes become your personal formula book.
As you experiment, try adding seasonal essential oils for variety. Lavender or lemon in the spring, herbal blends in summer, and cozy scents like pine or cinnamon in winter all transform the same simple recipe into something fresh and special.
Testing takes patience, but in time your candles will reflect your own home, your preferences, and the rhythm of the seasons.
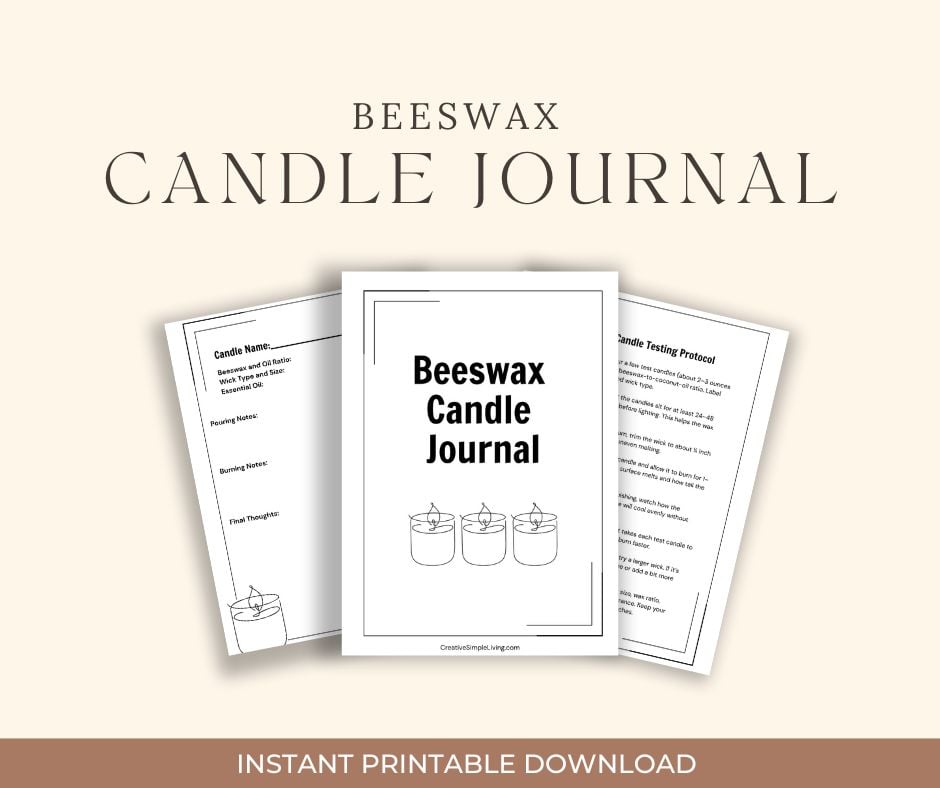
Use the form below to get Beeswax Candle Journal pages emailed to you.
Storing and Using Your Candles
Be sure to let the candles fully cure before burning, at least 24-48 hours. When you burn beeswax candles, burn them for 2-3 hours at a time. These two things will help prevent them from tunnelling.
Beeswax candles need to be stored in a cool, dry place just like other candles. I like to put lids on the mason jar candles, and put one or two (along with a lighter) in a cabinet or drawer in each room to use in case the electricity goes out.
Homemade candles are also really great to give as gifts. They can be part of a pampering package when bundled with homemade tea, an herbal bath soak and body butter.
Common Questions & Troubleshooting
Can I use a different oil instead of coconut oil?
Yes, but test carefully. Oils like jojoba, olive, or sweet almond can soften beeswax too, though they each change the burn differently. Coconut oil is preferred because it blends easily, stays stable at room temperature, and has a clean burn with little scent interference.
Why did my candle crack after cooling?
Cracking usually means the wax cooled too quickly or was poured too hot. Try pouring at a slightly lower temperature (around 145–150°F) and letting candles cool slowly at room temperature, away from drafts or cold surfaces. You can pour a thin layer of hot (but not too hot) wax on the top of the cracked candle to smooth out the top.


My candle tunneled down the middle — what happened?
Tunneling happens when the wick is too small or the wax is too hard. Use a slightly larger wick or add a touch more coconut oil (try 4:1 instead of 5:1). Always let the first burn last long enough for the entire surface to melt evenly — that helps prevent tunneling later.
Why is my candle too soft or melting unevenly?
You may have added a little too much coconut oil. Next time, increase the beeswax slightly or test smaller containers where the walls help retain structure. Room temperature can also affect firmness — warmer spaces soften candles faster.
Can I add essential oils safely?
Yes, but keep the ratio low — usually about 1 teaspoon per pound of wax is plenty. Add them after removing the wax from heat but before pouring, when the temperature is around 160°F or lower, so the oils don’t evaporate. Always test a small batch first.
The scent is too faint — how can I make it stronger?
Beeswax has its own gentle honey aroma, which can overpower light essential oils. Try slightly increasing your oil amount or blending stronger scents like lavender, eucalyptus, or citrus. Using unrefined coconut oil also helps hold and release fragrance better.
My wick keeps going out or the flame is small.
That’s usually a sign the wick is too thin for your container size or wax blend. Choose a thicker wick or switch to a cotton core or wooden wick, which works well in softer waxes. Trimming the wick too short can also cause weak flames — aim for ¼ inch.
The flame flickers or smokes — what should I do?
Too large of a wick or too much fragrance oil can cause soot or flickering. Try a smaller wick or reduce the scent load slightly. Make sure your candle is burning in a draft-free area and the wick is centered before the wax sets.
How long should I let my candles cure before burning?
At least 24 hours, but 48 is even better. This allows the wax and oils to fully set and improves the first burn. Store them in a cool, dry place with lids on (if using jars) to preserve scent.
Can I color beeswax candles naturally?
Maybe. You can try mica powders, botanical pigments, or a bit of colored clay. Avoid food coloring — it doesn’t blend well with wax and can clog wicks. Always mix small test batches to see how the colors hold up when burning.
What’s the best way to clean up spilled wax or tools?
Wipe tools with paper towels while still warm, then wash with hot water and mild soap. Never pour melted wax down the drain. If wax spills on fabric, freeze the item and scrape off the hardened wax before washing in hot water.

Easy Beeswax Candles with Coconut Oil
Make soft, smooth beeswax candles that burn evenly with this easy beeswax and coconut oil recipe — perfect for natural, handmade gifts.
Materials
- 1 Pound Beeswax
- ½ Cup Coconut Oil
- 1 teaspoon Essential Oil (optional)
Tools
- 6 4- ounce mason jars
- 6 3-inch candle wicks
- Wax Melter
- Wick Holders
- Glue Gun
Instructions
- Weigh and Melt: Weigh wax and coconut oil. Put them in a heat safe container and melt them over low heat. Use a double boiler or electric wax-melter.
- Prepare Containers: While the wax is melting, secure wicks to the containers. Be sure the wax holders are set aside to use as soon as the candles are poured.
- Add Essential Oils (optional): If you want to add some essential oils to the candles, add in just before pouring when the wax is 155–160°F. Stir gently to mix the scent throughout the wax.
- Pour and Cool: Once the wax and oil is completely melted, pour it into the containers. Be sure to pour slowly to avoid air bubbles; allow to set for at least 24 hours before burning.
- Trim and Burn: Trim the wick to ¼ inch and burn in 2–3 hour increments.
Notes
Beeswax Candle Testing Protocol
Make a Small Batch: Pour a few test candles (about 2–3 ounces each) using your chosen beeswax-to-coconut-oil ratio. Label each one with the ratio and wick type.
Allow Candles to Cure: Let the candles sit for at least 24–48 hours at room temperature before lighting. This helps the wax and oils fully set.Trim the Wick: Before each burn, trim the wick to about ¼ inch to prevent excess smoke and uneven melting.
First Burn Test: Light each test candle and allow it to burn for 1–2 hours. Observe how evenly the surface melts and how tall the flame is.
Cooling Observation: After extinguishing, watch how the surface re-solidifies. A good balance will cool evenly without deep craters or cracks.
Measure Burn Time: Track how long it takes each test candle to burn down by half. Softer waxes often burn faster.
Adjust as Needed: If the flame is weak, try a larger wick. If it’s flickering or smoking, reduce the wick size or add a bit more beeswax for firmness.
Document Results: Note wick size, wax ratio, scent performance, and appearance. Keep your best combination for future batches.

Looking for more fun projects to do with beeswax? Try one of these beeswax projects.

Angi Schneider is the author of The Ultimate Guide to Preserving Vegetables and Pressure Canning for Beginners and Beyond, both published by Page Street Publishing. She has taught canning classes for 177 Milk Street, been featured in Serious Eats, and written for Countryside Magazine. Angi has been sharing gardening, preserving, and simple living skills since 2010.
Thank you so much for this tutorial. I plan to make beeswax candles soon. Now, I will also add coconut oil to them!
I appreciate your hard work figuring all this out for your readers!
You’re so welcome!
There is tunneling on one side of wick. I made them 4 hours ago. I used 1/4 lb beeswax pellets and 2 tablespoons coconut oil. Any thoughts?
I’m assuming you aren’t burning them after just 4 hours, and that the “tunneling” is while the wax is cooling off. If that’s the case, you can add a thin layer of melted wax on the tunnel to fill it and smooth out the top. To avoid cracking while cooling, try melting the wax at a lower temperature and working in a warmer room (especially important during the winter, as the temperature variance can cause cracking while cooling).
Actually a question…I was always told not to add anything to my 100% pure beeswax candle making…does adding coconut oil to the mix NEGATE the removing of icons from the house air that 100% pure candles do remove? Very important!
I cannot find ANY reliable studies that show that beeswax candles actually remove toxins from the air. Therefore, I don’t worry about adding coconut oil to my beeswax candles. You can omit the coconut oil and use just beeswax, just know that you might get more tunnelling.