


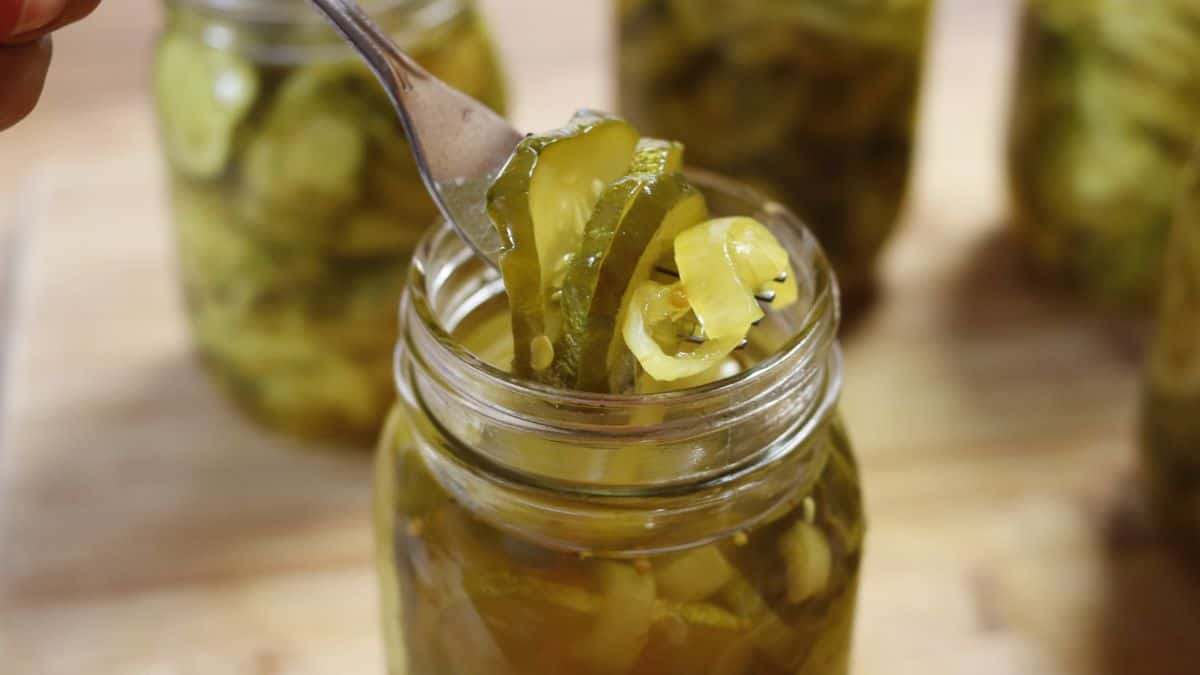
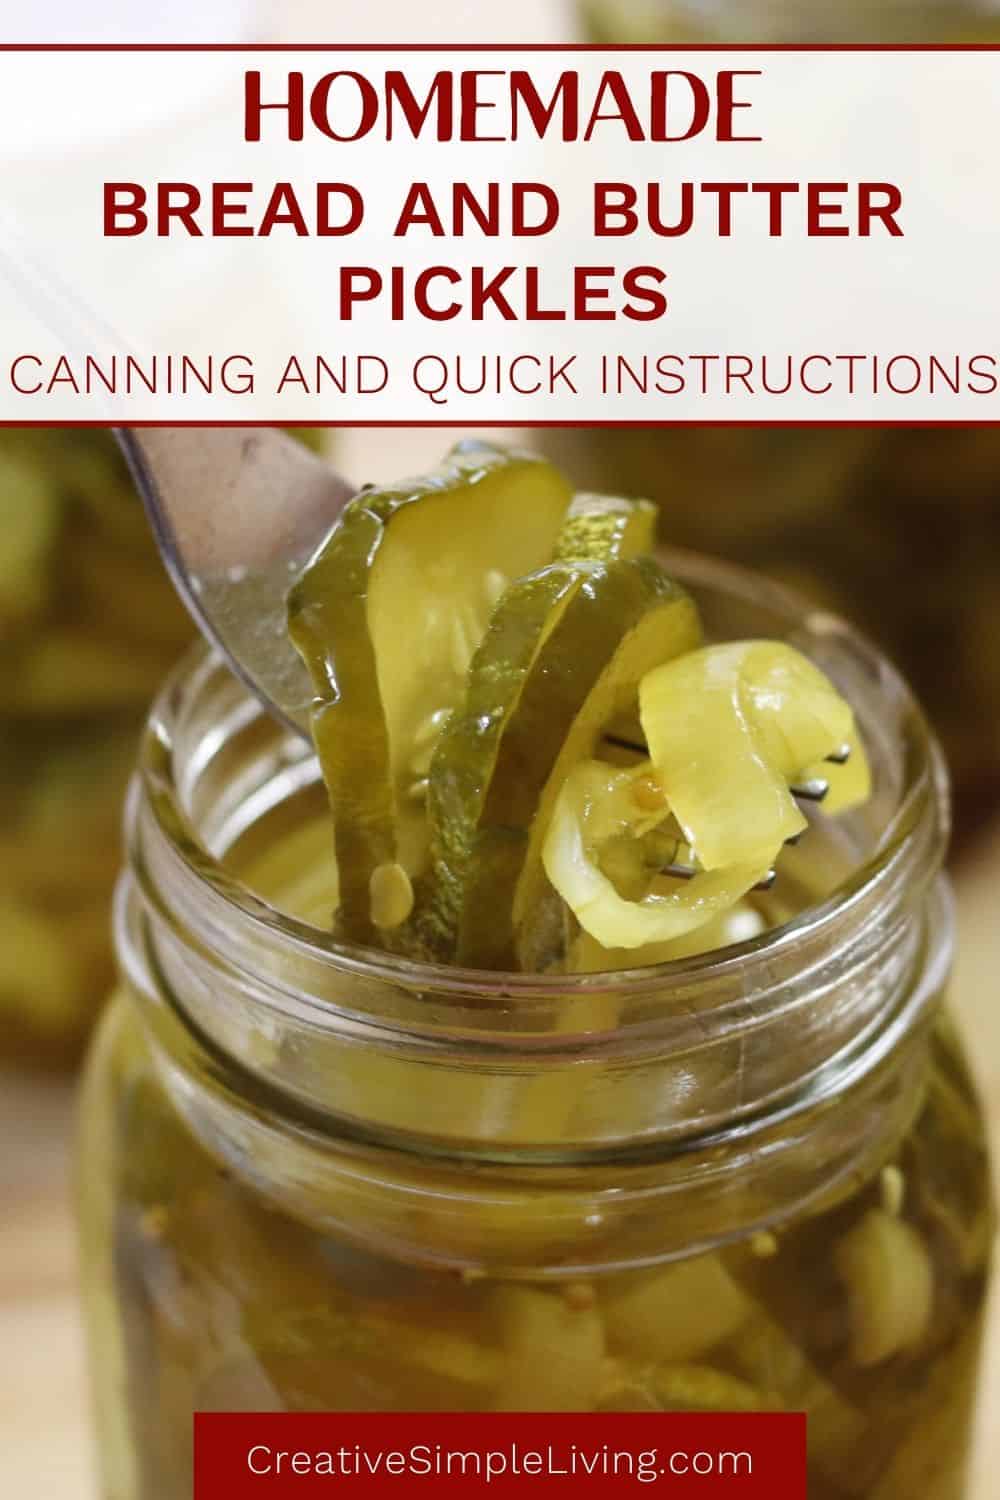
My granny’s old-fashioned bread and butter pickle recipe is just what you’re looking for in a pickle. A crunchy pickle with the perfect balance between tangy and sweet!
“I doubled the recipe because this is my daughter in laws favorite pickle. These are absolutely amazing. I don’t even like pickles and even I think these are great.” Sandy
Growing up, I thought that my Granny was the only one who knew how to make Bread and Butter pickles. I didn’t know anyone else who canned and my mom never bought them at the store.
So, when I started canning I wanted to start with my Granny’s recipes. However, by the time I started making pickles, my Granny had passed. And I didn’t have her recipe.
I asked one of my Aunts and she sent me a packet with photo copies of some of my Granny’s recipes and among them was her bread and butter pickle recipe. Well, actually Mrs. May’s recipe…

Here’s what’s written…
1 gal med sized cucumbers, 8 small onions, 1 green pepper, 1 red sweet pepper, 1/2 cup canning salt. Slice cukes, onions and peppers, add salt, cover with ice and mix well. Let stand three hours. Drain. Make a solution of 5 cups sugar, 3 cups white vinegar, 1/2 tsp turmeric, 2 tbsp mustard seed, 2 tbsp celery seed, 1/2 tbs ground cloves. Cover cukes with liquid, bring to a boil and seal.
I love how sparse recipe cards were back then. People grew up cooking and preserving and didn’t really need tons of instructions. Don’t worry, I give step by step instruction in the recipe card, so if you’ve never canned before, you’ll still be able to make these pickles.
Why are they called Bread and Butter Pickles? Honestly, I have no idea. I went down a bit of a rabbit hole trying to find out and at some point I just gave up. The problem with internet research is that you don’t know if the sources are just saying the same thing because it’s true or because everyone else is saying it.
One story is that the creator, Mrs. Fanning, traded jars of her sweet and sour pickles for staples like bread and butter during the Great Depression. Another story is that they’re so good you could make a sandwich with just bread, butter and these pickles and be satisfied. I’m sure the true story of how a bread and butter pickle recipe spread across the country quickly (without the internet) and is still being made and love almost 100 years later is filled with all kinds of twists and turns and mystery.
What I do know is that they’re really great and will make a welcome addition to your home preserved pantry.

This recipe was reviewed for accuracy and food safety by Angi Schneider in April 2026. All processing times and methods follow tested guidelines from the USDA and the National Center for Home Food Preservation (NCHFP).
Notes on Ingredients
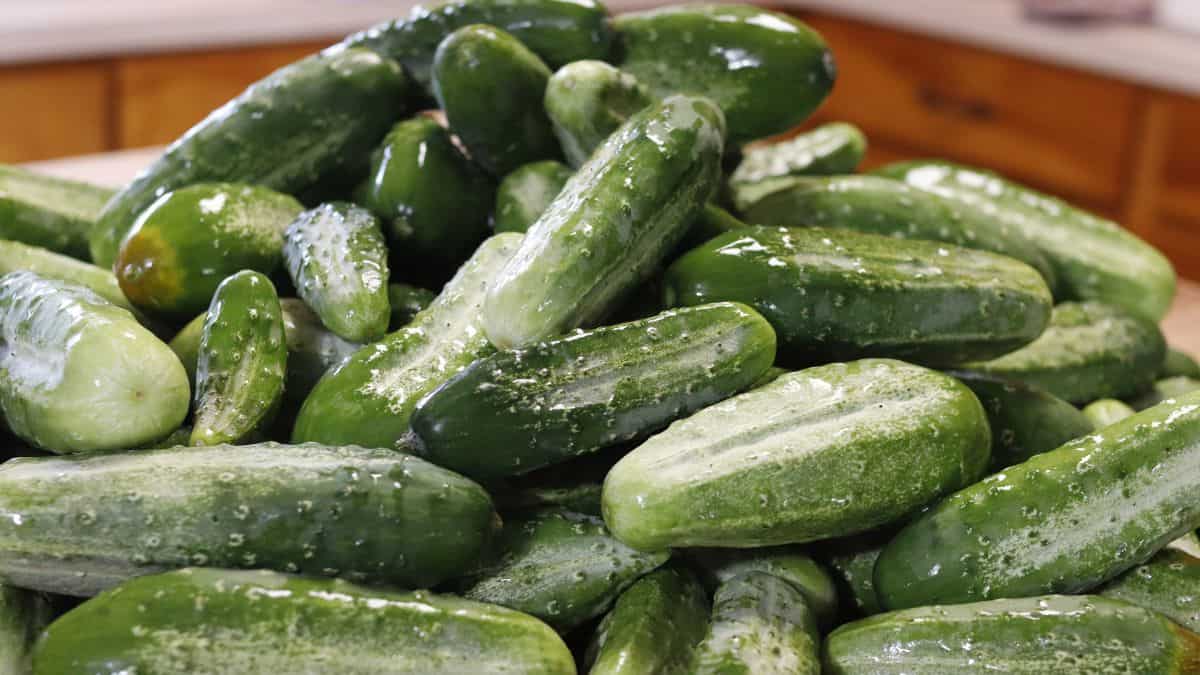
Cucumbers: For pickles, you’ll want to use pickling cucumbers, not snacking or slicing cucumbers. Pickling cucumbers have less moisture and thinner skin which will make a for a crisp, flavorful pickle. For the crispiest pickles choose fresh, young cucumbers. The larger the cucumber the softer the pickles.
Onions and Garlic: White or yellow onions are great for bread and butter pickles. In a pinch you could use red onions, but the brine will be discolored from them.
Vinegar: For canning, the vinegar needs to be 5% acidity – it will list the acidity on the label. White vinegar is usually used for bread and butter pickles, but I like to use a mix of white vinegar and apple cider vinegar. You can also use all apple cider vinegar if you prefer, just know that the color and flavor will be a little different. Do not used homemade vinegar for canning.
Salt: For salting the cucumbers and onions, you’ll want to use canning salt (sometimes called pickling salt). If you absolutely just do not want to use canning salt or can’t find it, you can substitute another non-idolized salt for it.
Spices: I love the flavor combination of mustard seeds, celery seeds and turmeric. As you can see from the recipe above my Granny also used ground cloves, which I omit. You can safely add other dry spices such as peppercorn or even spicy red pepper flakes (which is how I create my sweet and spicy pickle recipe.)
Notes on Canning Equipment
For pickles to be shelf stable, they need to be processed in a water bather canner.
Water bath canner: This is a large pot with a rack to keep the jars from touching the bottom of the pot.
Jars: Mason jars are the jars of choice for canning in the US. They’re easy to find as most grocery stores and hardware stores carry them. If you’re in Europe, you should be able to easily find Weck jars. Be sure to follow the instructions that come with them.
Lids and Bands: Two-piece lids and bands are used for home canning. For lids, there are metal single-use lids or plastic reusable lids. If I know I’m keeping the canned food for my family, I try to use the reusable lids to cut down on the cost of canning. If I think I might give the food away, I use the metal single-use lids.
Canning Tools: Jar lifter, canning funnel, bubble remover/headspace checker tool.
Kitchen Tools: These are things you probably already have in your kitchen, such as a cutting board, sharp knife, large bowl, large stock pot, clean kitchen towels, measuring cups and spoons
Pro Tip: If you don’t have a water bath canner, you can use a large pot that’s tall enough that water can be above the jars by 2 inches and still boil. Put a layer of canning jar bands on the bottom (right side up) to create a platform to put the jars on so they don’t touch the bottom of the pot.
Crisp Bread and Butter Pickles
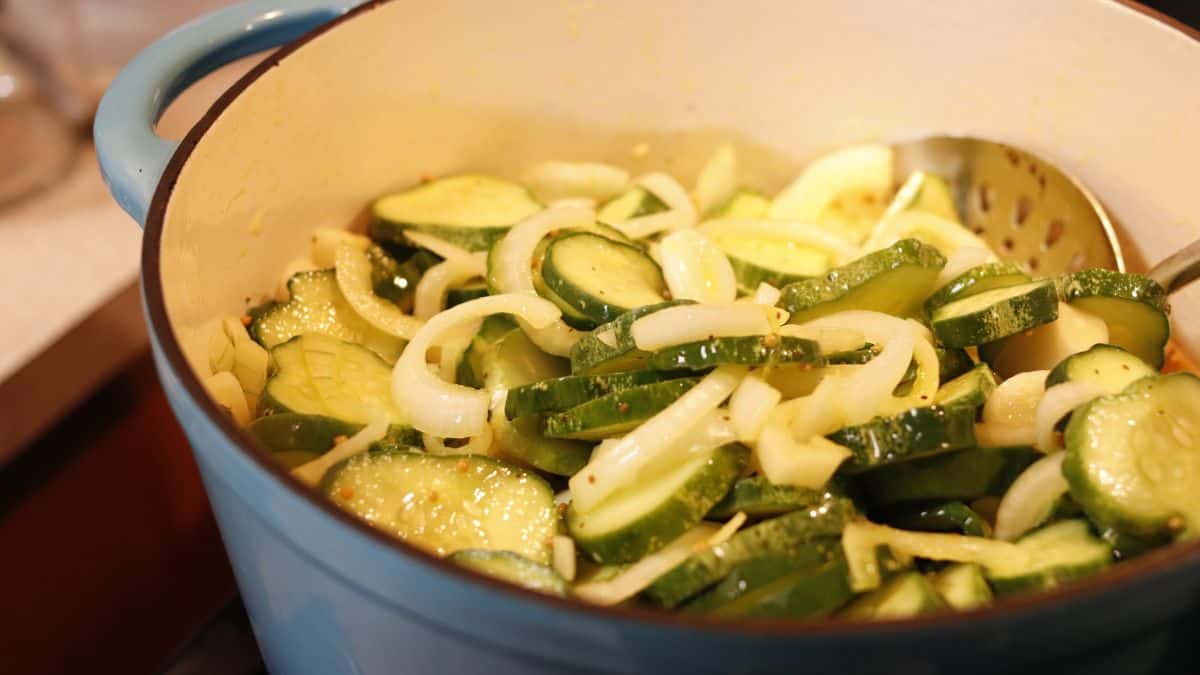
The “secret” to crisp bread and butter pickles is the icing and salting. So, don’t skip this step!
Once you’ve sliced the cucumbers and onions, you’ll put them in a large bowl. Sprinkle them with canning salt and mix together. Put a clean dish towel (flour sack towels work great for this) over the bowl. Add a bunch of ice on top. Fold the towel overhand up onto the ice. This will keep the melting ice from dripping on the counter. Let it sit for three hours.
(disclaimer: While talking with Kathie on the Hand-Me Down Recipes podcast, I realized that I have no idea why I use the towel with the ice on top. I think it’s because I didn’t want to run the risk of the cucumbers freezing to the ice temporarily. Clearly, my Granny just mixed it all together, but she also didn’t have air conditioning so the ice would have melted very fast in South Texas. If you don’t want to use the towel in that way, just mix it all together and cover with a towel to keep any flies off.)
When you remove the towel, all or almost all the ice should be melted. Drain the water from the cucumber and onion mixture. And then give them a rinse in fresh water.
Now you’re ready to make bread and butter pickles!


How to Make Bread and Butter Pickles
Prepare the Vegetables
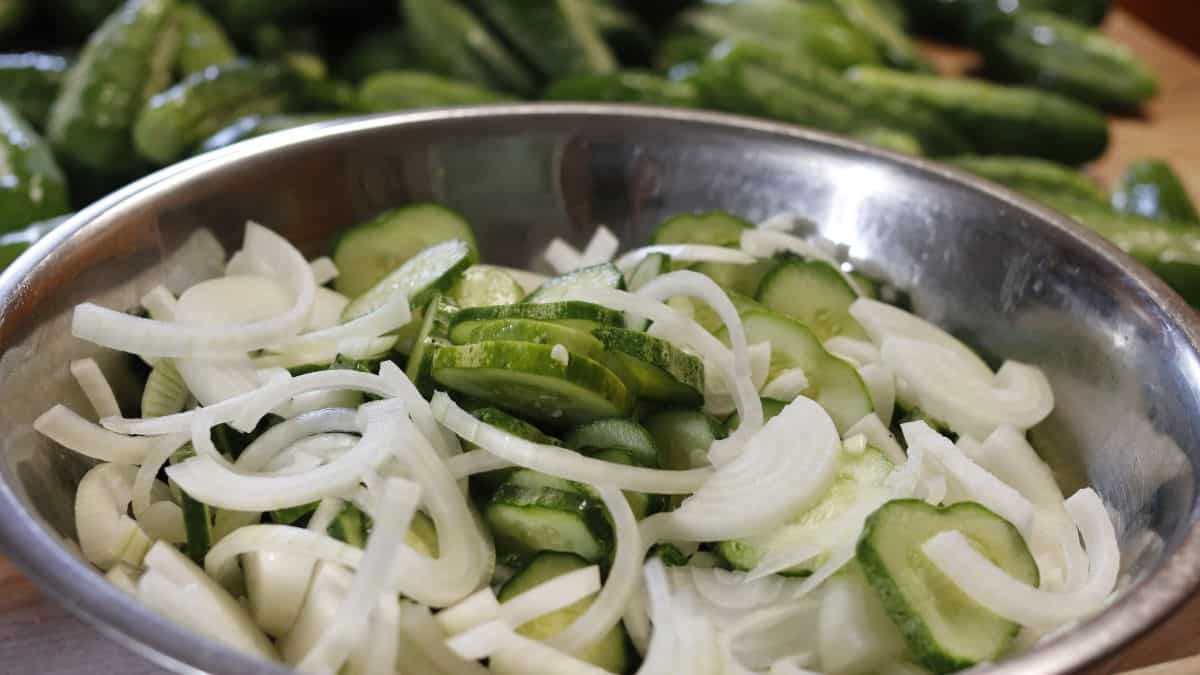
Wash the cucumbers in cold water and slice them in 1/4-inch rings. They don’t have to be exact. If you want wavy edges, use a crinkle cutter knife. Put the slices in a large bowl. Toss the blossom end piece. The blossom end is the opposite end the stem end. This end has an enzyme that can make cucumbers bitter so we don’t use that piece.

Peel the onion and cut half. Lay each half on the cut side and cut the onion in 1/4-inch slices. Put the onion slices in the large bowl with the cucumbers.
Peel the garlic and add the pealed cloves to the bowl with the cucumbers and onions. Add the salt and mix well.
Ice the vegetables. You can either mix the ice in with the vegetables or put a towel over the vegetables and put the ice on top of the towel.
Prepare the Canning Equipment
After the cucumbers have been sitting for about 2.5 hours, it’s time to get the canning equipment ready. You can do it sooner, just don’t turn on heat under the canner until about 30 minutes before your ready to use the jars.
Wash the water bath canner, jars, lids, bands and canning tools in hot soapy water. Rinse well.
Fill the canner up about half way with water and put it on the stove over medium heat.
Check the jars for any nicks or cracks. Put the jars in the canner to stay hot while you make the brine. There is no need to boil or sterilize the jars since the processing time is 10 minutes. You just want the jars to stay hot.
Set the lids and bands aside to use later.
Lay a clean kitchen towel on the counter to put the hot jars for filling. Close to the stove is ideal. Put the jar lifter, canning funnel, and debubbling and headspace tool next to the towel.
Make the Pickles
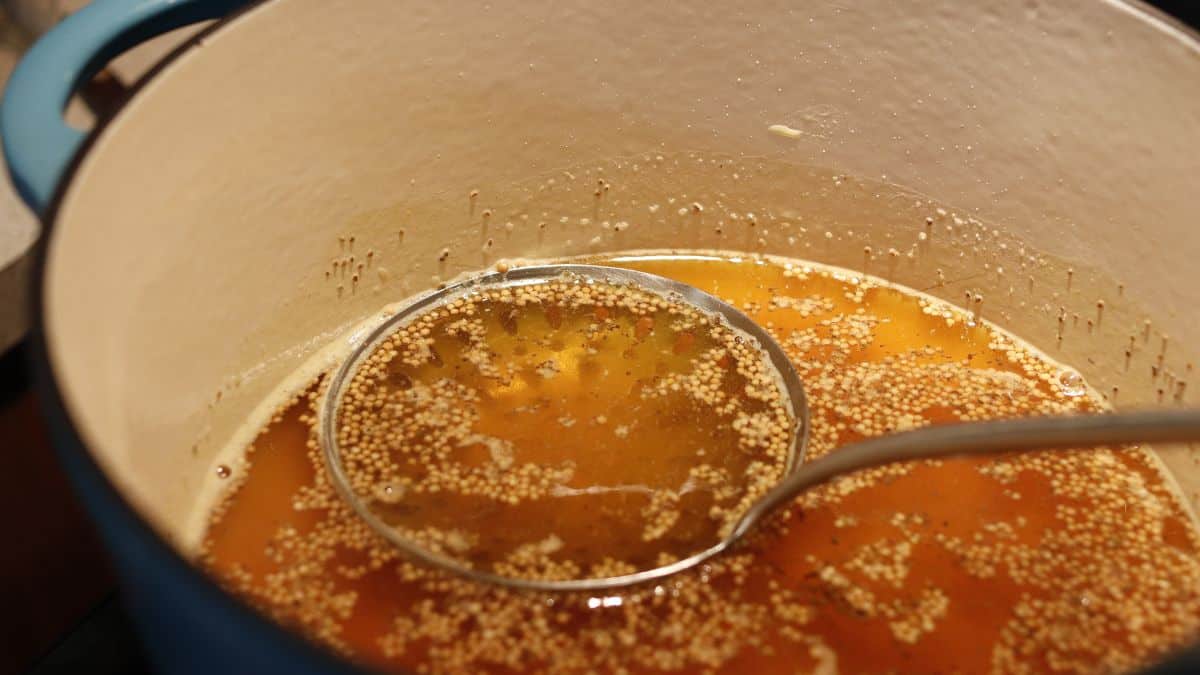
After the cucumbers have been sitting for 3 hours. Make the brine in large stockpot by combining the vinegars, sugars and spices. Bring to a boil.
While the brine it coming to a boil, pour the (now) saltwater off the vegetables. Rinse the vegetables in fresh water to remove excess salt.
Once the brine is boiling, add the cucumber mixture and bring back to a boil.
Using a jar lifter, remove one jar from the water bath canner and put it on the prepared kitchen towel. Fill the jar with pickles and brine leaving a 1/2-inch head space. The solids should be loosely packed in the jar – do not squish a bunch of solids in the jars.
Using a bubble remover tool (or a silicone spatula or chopstick) gently remove any bubbles in the jar. Put the bubble remover tool between the inside glass of the jar and the solids. Gently press the solids towards the center of the jar just a bit and the bubbles with float to the top and burst.
Recheck the headspace and add more brine if necessary to keep the 1/2-inch headspace.
Use a clean, damp cloth to wipe the rim of the jar. Center the lid on the jar and add a band. The band should be “fingertip” tight, not cranked down in the jar. Think about how most people put the lid on a mayonnaise jar, that’s how tight you want the band. If it’s too tight, the air inside the jar cannot escape, the lid will buckle, and the jar won’t seal.
Put the jar back into the water bath canner. Fill the rest of the jars in the same manner.
Pro Tip: If you run out of brine before all the jars are filled, you can make a small batch. It doesn’t need to be exactly like the original brine. In a small saucepan, add equal amounts of white vinegar and apple cider vinegar. Add some sugar and a pinch of turmeric, celery seed and mustard seed. Bring it to a boil and then use it to top off the last jar.
Once all the jars are filled and back in the canner, put the lid on the canner and bring the water to a boil over high heat. Process jars for 10 minutes – adjusting for altitude (see chart below)
| Style of Pack | Jar Size | Elevation (feet) | Processing Time (minutes, boiling-water canner) |
|---|---|---|---|
| Hot pack | Pints & Quarts | 0 – 1,000 ft | 10 minutes |
| Hot pack | Pints & Quarts | 1,001 – 6,000 ft | 15 minutes |
| Hot pack | Pints & Quarts | Above 6,000 ft | 20 minutes |
After processing, turn the heat off and remove the lid from the canner. There will be a lot of steam, so be sure that when you remove the lid, the steam will go towards the stove and not towards your face. Let the jars rest for 5 minutes while the canner cools just a bit.
Lay a fresh clean towel on the counter and remove each jars from the canner. There’s no need to tilt the jars to pour of any water on the lids, it will evaporate quickly. If you tilt the jars, you run the risk of solids getting up underneath the lid and preventing it from sealing.
Do not touch the jars once they’re out of the canner. Let them cool for 12-24 hours. If you used metal lids, you’ll start hearing some popping. Still do not touch the jars.
The next morning, remove the bands and check the seals. To check the seals, put down on the lid, there should be no movement. If there is, the lid didn’t seal properly. I also like to gently pick up the jar by the lid just an inch of so off the counter. If the lid didn’t seal, it will come off.
If any jar didn’t seal, label it and put it in the refrigerator to use first.
Wash the sealed jars by wiping them down with a clean wash cloth. Some people will put them in a sink of soapy water, but I’ve never felt a need to do that. Be sure to clean around the groves where the band was.
Label the clean jars and store in a cool, dry place.
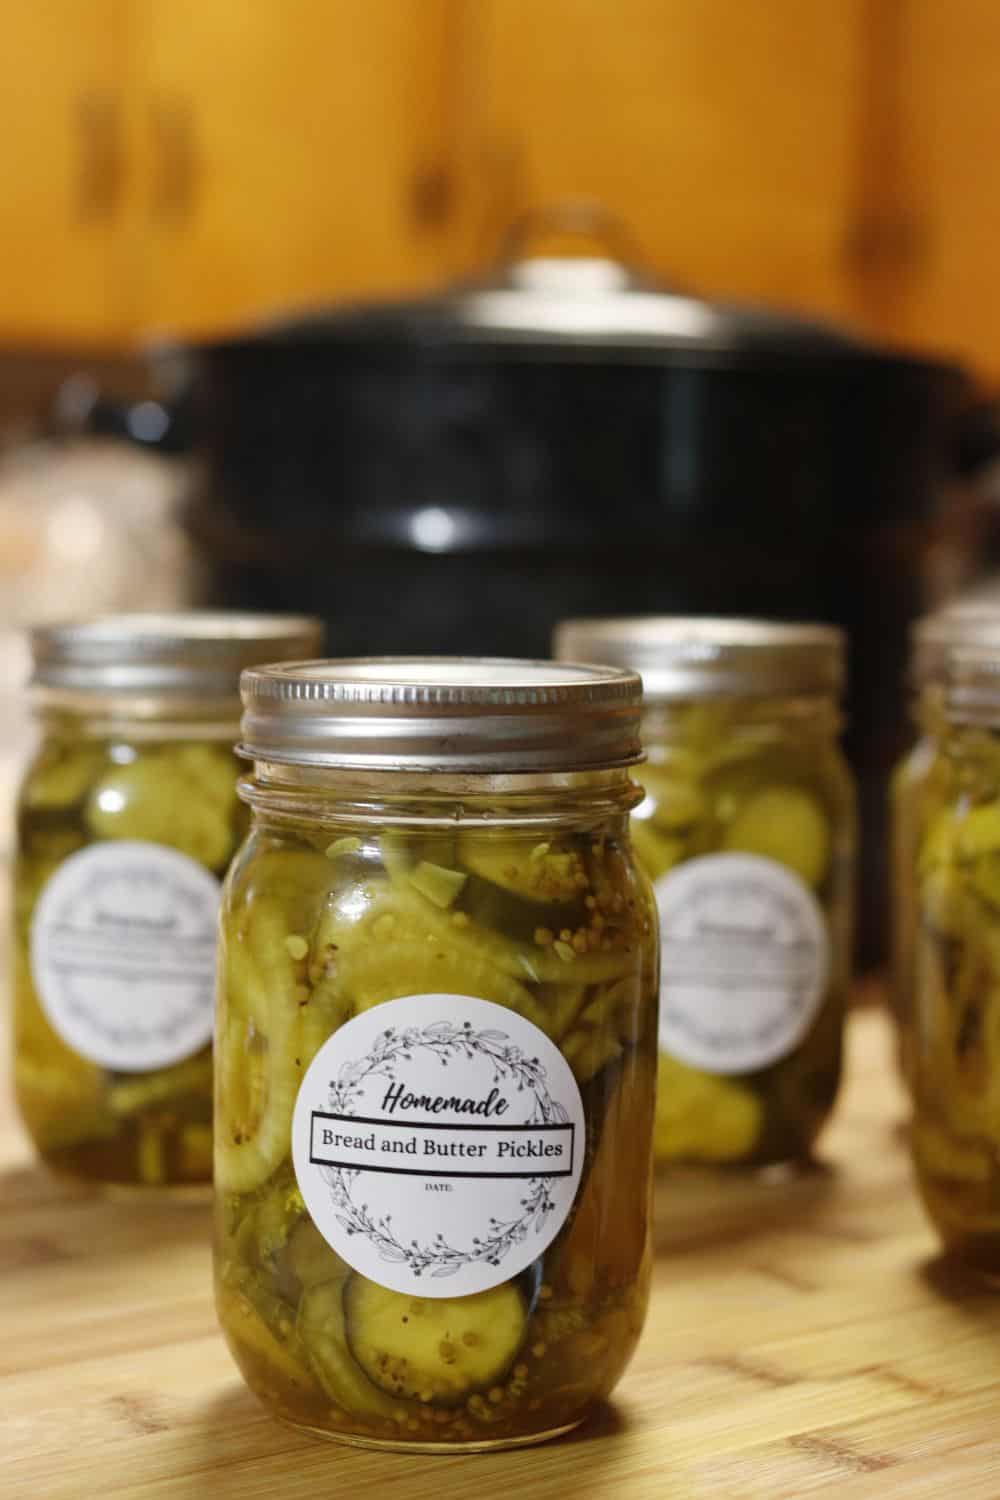
Labeling and Storing Pickles
Unless you only make one type of pickles, it’s really important to label the jars. If you’re using metal lids, you can just use a permanent marker and write on the lid. If you’re using reusable lids (I highly recommend) you can use a piece of masking tape on the jar or lid to write on.
I like to print cute labels for the jars I give as gifts. If you’d like to use them, just fill out the form below and the printable copy will be emailed to you.
Be sure to store sealed jars in a cooled area. If you need to get creative for finding places to store your home canned food, here are some food storage tips to help you out.
As long as the jars are sealed, they’re safe to eat. However, the quality will diminish over time, this is especially true with high vinegar recipes. Use the pickles within a year for best flavor and texture.
FAQ & Troubleshooting
Pickling cucumbers are your best bet — they have thinner skin, less moisture, and a firmer flesh than slicing or snacking cucumbers, which means crispier pickles. If you can only get slicing cucumbers, pick them young and small and they’ll work fine. The most important thing is that your cucumbers are fresh. The older the cucumber, the softer your pickles will be.
This is the step that makes the difference between crispy pickles and soggy ones, so don’t skip it! The salt draws out excess moisture from the cucumbers, and the ice keeps them cold and firm while that happens. Together they help the cucumbers hold their crunch through the canning process. My Granny knew what she was doing.
Absolutely. Just follow the recipe through the filling step, let the jars cool, put the lids on, and store them in the refrigerator. They’ll keep for about 4–6 weeks in the fridge. They won’t be shelf stable, but they’re just as delicious — and you can skip setting up the water bath canner entirely.
You can reduce it somewhat, but it will affect the flavor — bread and butter pickles are supposed to be sweet, so reducing the sugar too much changes their character. The sugar does not affect the safety of the recipe since the acidity of the vinegar is what makes these shelf stable. If you want to experiment with a sugar substitute, Penn State Extension has a helpful article on canning with less sugar that’s worth reading before you try it.
Yes, you can use all apple cider vinegar if you prefer. Just make sure whatever vinegar you use is labeled at 5% acidity — that’s what keeps the pickles safe for canning. The flavor and color will be a little different with all ACV, but many people prefer it. What you should never do is use homemade vinegar for canning, since the acidity level can’t be verified.
A few things can prevent a proper seal: the jar rim had residue on it when you put the lid on (always wipe it with a clean damp cloth), the band was tightened too much or too little, or the jars weren’t processed long enough. Any jar that doesn’t seal should go straight into the refrigerator and be used first — it’s perfectly safe to eat, just not shelf stable.
You can eat them right out of the canner if you just can’t wait — we often do! But the flavor really does deepen and develop over time. The general recommendation is to wait 4–6 weeks for the best flavor. Once you open a jar, store it in the refrigerator.
As long as the jar is sealed, the pickles are safe to eat. The USDA recommends using home canned food within 12 months for best quality, since the texture and flavor start to diminish after that — especially with high-vinegar recipes like pickles. Store your sealed jars in a cool, dry place away from direct light.
Yes! This recipe doubles easily. Just make sure your stockpot is large enough to hold the extra brine and cucumbers, and process the jars in batches if your canner can’t fit them all at once. Processing time stays the same regardless of how many batches you make.
Skipping the salting and icing, using overripe pickling cucumbers or using snacking or slicing cucumber will result in soft pickles. While soft pickles aren’t the best, there’s nothing unsafe about them. Chop them up and use them as sweet relish for hot dogs, tuna, chicken and potato salad.
Table salt isn’t the best choice for a canning salt substitute. The salt for canning needs to be non-iodized and without any anti-caking agents.
Cloudy brine is usually from using hard water or using salt with anti-caking agents or minerals in it. If the jars were properly processed and sealed, cloudy brine is just a cosmetic issue and doesn’t affect the safety of the pickles.
Serving Suggestions
Bread and butter pickles are so tasty you can just eat them straight out of the jar. Here are some other serving ideas….
- Great on sandwiches and hamburgers
- Serve on charcuterie boards and relish trays
- Chop up and use in deviled eggs, potato salad, tuna or chicken salad
- Chop and use as sweet relish on hot dogs or in homemade sandwich spread
- Use the brine as a homemade salad dressing by adding some olive or avocado oil to it
Tried this recipe? Please leave a ⭐️⭐️⭐️⭐️⭐️ star rating in the recipe card below and/or a review in the comment section further down the page. We always appreciate your feedback. You can also save the recipe for later by pinning it or clicking on the heart in the lower right hand corner.

Ingredients
Equipment
Method
- Slice the cucumbers, onions and peel the garlic2 1/2 pounds Cucumbers, 1 pound Onion, 1 Head of Garlic, 1/4 cup Canning Salt
- Put cucumbers, onions, and peeled garlic in a large bowl.
- Sprinkle the canning salt over them and then covered them with a clean towel.
- Put ice on the towel.
- Let it sit for about 3 hours.
- When the cucumbers have been sitting for about 2.5 hours, wash the water bath canner and fill about halfway with clean water. Put the rack in the canner and put the canner on the stove.
- Wash the jars, bands and lids in hot, soapy water and rinse well. Look for any nicks or cracks on the jars. Set the lids and bands aside for later use.
- Put the clean jars in the water bath canner and heat over medium heat and let the jars simmer to keep them hot. You want the water to be about 180℉ since this is a hot pack recipe.
- Using a large stockpot, make a brine out of the vinegar, cider vinegar, sugar, mustard seed, celery seed and turmeric. Bring to a boil.1 1/4 cup White Vinegar, 1 cup Apple Cider Vinegar, 2 1/4 cups Sugar, 1 Tablespoon Yellow Mustard Seed, 3/4 teaspoon Celery Seed, 1/2 teaspoon Ground Turmeric
- Pour the now salted water off the cucumbers and rinse the vegetables in fresh water.
- Put the rinsed cucumbers, onions and garlic in the pot with the brine and bring back to boil for 90 seconds.
- Spread a kitchen towel on the counter and using a jar lifter, remove one jar from the water bath canner. Pour the water that's in the jar back into the canner. Put the jar on the towel.
- Using a canning funnel and funnel, fill the jar loosely with cucumbers and onions. Ladle some of brine over the solids keeping a 1/2-inch headspace.
- Using the bubble removal tool or a silicone spatula gently remove the bubbles from the jar. Make sure all the solids are submerged under the brine. Remove any solids that won't stay under the brine to use in another jar.Recheck the headspace and add more brine if necessary to maintain 1/2-inch headspace.
- Wipe the jar rim with a clean, damp cloth to remove any residue. Center the lid on the jar and tighten the band on the jar to finger tip tight (like you would a mayonnaise jar) Using a jar lifter, put the filled jar back into the canner.
- Continue filling one jar at a time until you've run out of mixture. If you don't have enough to properly fill the last jar, you can store it in the refrigerator and use it first.
- The water in the canner should be 2-inches above the tops of the jars. If it's not, add more hot water to the canner.
- Put the lid on the canner and bring to a boil over high heat.
- Once the water starts boiling, process the pint jars for 10 minutes. Adjust for altitude if necessary (see Notes)
- After 10 minutes, turn off the heat and remove the lid from the canner (be sure to tilt the lid away from your face). Let the jars sit for 5 minutes while the canner cools off.
- Spread a clean towel on the kitchen counter.
- Without tilting the jars remove them from the canner and put them on kitchen the towel on the counter. Let cool for 12-24 hours. Don't tighten the bands or touch the lids.
- The next morning, remove the bands and check the seals. To check the seals, touch the top of the lid, there should not be any movement. If there is, the jar didn't seal correctly. You can also gently lift the jar by the lid (without the band on). If it's not sealed the lid will come off. If any didn't seal, put them in the refrigerator to use first.
- Wipe the sealed jars with a damp cloth to remove any residue that might be on the jars.
- Label the clean, sealed jars and store them in cool, dry place.
- We think these pickles are fantastic right out of the canner, however, its generally recommended to wait 4-5 weeks before opening home canned pickles for their flavor to develop fully.
Nutrition
Notes
Tried this recipe?
Let us know how it was!Looking for More Pickle Recipes?
If you like pickles, you’ll definitely want to try these other pickle recipes. They’re not only delicious but they use the same easy water bath canning process for safety.
Canned Dill Pickles
Canned Sweet and Spicy Pickles
Pickled Cauliflower
Pickled Carrots
If you just want to a quick vinegar pickle, you should check out our Refrigerator Dill Pickles and if you want a probiotic-rich fermented pickle we have you covered with Fermented Dill Pickles and Fermented Peppers.

The Ultimate Guide to Preserving Vegetables
If you you’re looking for more preserving inspiration, I know you’ll love The Ultimate Guide to Preserving Vegetables. In this book I share how to can, dehydrate, freeze and ferment almost every vegetable. I also share 100 favorite recipes for preserving the vegetables in fun way that will save you time and money later. Get your copy here.

Angi Schneider is the author of The Ultimate Guide to Preserving Vegetables and Pressure Canning for Beginners and Beyond, both published by Page Street Publishing. She has taught canning classes for 177 Milk Street, been featured in Serious Eats, and written for Countryside Magazine. Angi has been sharing gardening, preserving, and simple living skills since 2010.
Ooh! I love bread and butter pickles. I canned some a few years back when we lived in Vilnius, Lithuania. They are really good on bread and butter. Who knew? You have me craving some. Perhaps I will try canning some more this year.
You are funny. We have only lived these two places. It’s fun but you get to missing home.
You guys have lived everywhere! If you get to pick where you live when you come back to the states, pick a place near me. That way my kids can learn more about other countries!
My second year trying to “can”. So far this is the best recipe i have found! After trying these, I think I’m going to have to make two more batches and give as gifts. They are amazing!!
Thanks so much for sharing, Quincy! I’m glad you like them.
Hi, I’m a first time canner, recipe looks delicious. How long are they good for? Do I leave them in the refrigerator or in a cupboard till ready to eat? Thank you
Hey Kim, they are shelf stable for a year or more. As long as they were processed according to the directions they are perfectly safe as long as the lids are sealed. However, just like all other food, their quality will diminish over time. The USDA recommends that home canned food be eaten within a year because of this.
my sister has been after me to make these. Yours look perfect. Guess I’ll have to give them a try now 🙂
This will be my first year canning cucumbers and I’m wondering if you need a certain type of cucumber to make bread and butter pickles. I’ve never really had much luck with growing them so I just planted some seeds and waited. Well this year they grew like crazy and I have to do something with all of them. Only problem is I’ve thrown the packet out and have no idea what kind of cucs they are. Any input would be appreciated.
Great question! I’ve used both pickling cucumbers and slicing cucumbers. Just pick them when they’re kind of small and they’ll be fine. Great job growing the cukes!
Hi Angi, It’s well and truly cuke season down here in Australia right now. I decided to follow your recipe for B and B cukes. Just wondering do you rinse the salt from them after they’ve sat for a few hours or include it all when adding them to the brine? I’ve seen other recipes that suggest a rinse after salting is required, just wondering if your recipe includes the salt in the final product. Great site BTW. TIA!
Hey Rob, I do rinse the cucumbers a bit after pouring off the salted water. I should add that to directions {ahem}.
Is there any way you could share your grandmother tecipes with me .I love idea of use old Recipes.
Hi Dawn, I’m so glad you asked as I’ve been meaning to update this post. I’ve added my granny’s recipe to the post.
How many pints will this recipe make?.
Great question, Jerry! This recipe will make 4 pints of pickles.
I made this recipe tonight. A friend of the family Gabe us a ton of cucumbers and not all in my house are fans. I added a few extra cups of vinegar and water to my brine, I ended up with six and a half masons jar full of pickles. I’m super proud of myself for making my own pickles and extra happy to share with friends. Thank you for your lovely recipe! 😋
I’m so proud of you too! Thanks for sharing and I hope you enjoy the pickles.
How long do you let them sit before you can consume them?
Hi Jason, you can consume them right away but the flavors develop and deepen over time. I try to let them sit for 4-5 weeks before eating them. But they are perfectly safe (and tasty) to eat before that.
Angi, thanks for sharing your Granny’s recipe! It looks so interesting that I just have to try it. I’ve done a lot of canning but have never made pickles and have a question. What is canning salt? Thanks!
Basically, it’s just salt with that doesn’t have any anti-caking agents or iodine added to it – just salt, nothing else. I don’t always use canning salt, I also use sea salt (just make sure it doesn’t have any anti-caking agents added to it.) Canning salt is usually sold in boxes similar to Rock Salt that is used in an ice cream machine. Hope that helps.
When you let them sit for 3 hours should that be in the fridge? That ice will melt in about 10 minutes here in SE Texas.
Hi Carol, the ice is supposed to melt so as long as you keep them inside, at room temperature they will be fine.
The original recipe called for cloves, I noticed your recipe does not have it, is there a reason for that?
No, there’s not a good reason for leaving out the cloves. Sometimes I toss them in and sometimes I don’t. I will say,the flavor isn’t much different with them so if you don’t have them on hand, go ahead and make pickles anyway. If you have them on hand, go ahead and add them.
This was my first time ever trying to can a the bread and butter pickle recipe was awesome not to mention they were great. Thank You👏👏👏👏
Vickie, thank you so much for sharing this! I’m so delighted and know my Granny would be too.
Hey there! After you add the cucumbers and bribe to the hot jar, do you put the jar is boiling water for a bit so that the top can pop? That’s how my husband pickled his peppers so I didn’t know it if was the same way.
Thanks!
Hi Denise, yes, that is what “process for 10 minutes for pints in a water bath canner” means. Put the jars in the water bath canner with hot but not boiling water. Make sure that the water covers the jars by at least an inch. Bring the water to a boil and once it starts boiling, then you start the timer. Hope that helps!
I forgot the onions it’s been three hours I’m ready to make brine what should I do
Make them without onions then. They will still be tasty!
How many cucumbers do you think would this be? Onions too,Please Thank you 😊
Depending on the size of your cucumbers and onions, I would say 3-5 cucumbers and 1-2 onions.
I’m about to try the Granny recipe!!! In the process now! I will let you know how we like them!! I’m sure they will be tasty no doubt! Old recipes are awesome! From Michigan USA!!
Thanks, Maria! I hope your family enjoys them. We love them.
I made 18 jars today using English cucumbers. I just couldn’t remember how long they should sit before eating. Thanks for sharing your recipe.
You’re welcome! You can eat them right away but the flavor will develop more over the next couple of weeks.
How many jars is this recipe for and what size jars?
It makes about 4 pint jars. I’ve added that to the recipe, thanks for asking!
@Angi Schneider, the recipe makes 2qts. Packing the cucumbers in the jar.
I made your recipe last year and it was such a hit, that I got a request to make more this year! My Dad said they tasted just like he remembered when his Mom canned bread and butter pickles. That’s a huge win in my book! I wish I had my granny’s recipe, but I dont, so I want to try your granny’s how she wrote it next! Thanks for sharing.
oh my gosh, this makes me so happy to hear, Kerry! Thank you so much for sharing with me. Just remember to process them…lol…Granny didn’t write that obvious stuff down.
How much water for the brine? Didn’t see in the recipie
There’s no water in the brine, just vinegar.
Hi Angi,
I have made my Nana’s Bread and Butter pickles almost ever year for the last 25+ years. I also have her hand-written recipe card as well! However, I am in the middle of making pickles and needed to check the amount of spices and I can’t find the recipe! I know I will eventually! I was so happy to find yours as it is exactly the same and written in a very similar way! Such a special thing to have these recipes passed down to us!
Thank you for sharing yours!
Hi Susan, I hope you find your Granny’s recipe soon! It is such a special thing. I’m glad mine could temporarily stand in for this season.
Thank you so much for the recipe!! I’ve canned a few things but never pickles until this year and I have to admit bread and butter pickles is not something I eat but my mom and husband love them! Growing up my mom done a lot of canning to feed the family (I’m the baby of 7 kids) one year she had 999 jars of different stuff!! I was amazed but she was bummed she didn’t hit 1,000 jars! Anyway she’s getting up in her years and couldn’t find her recipe for bread and butter pickles and couldn’t remember measurements but basically knew the ingredients so I went searching and came across your recipe!! I made a batch that pleased both my mom and my husband!!! Mom said that’s how they should taste! And my husband has already ate a few of the jars!!! I’m getting ready to make more but I wanted to thank you for sharing your recipe!! I greatly appreciate it ❤️
Deena, thank you so much for sharing this with me. It’s made my day! 999 jars is a LOT, what an fun memory. I’m so glad your mom and husband like them, my Granny would be proud.
How much garlic is 1 head? Is it a whole fist?
A head of garlic is the whole round garlic. The individual pieces are called garlic cloves.
Angi,
Thanks for the recipe. I currently have them in the bowl with towel and ice over them… I noticed the instructions say ladle Into hot jars. How do you heat your jars?
Hi Brian, I put my jars in the water bath canner with hot but not boiling water to keep them hot. If you have a dishwasher you can use that to heat them. The main thing is that you don’t want to put the hot cucumbers and brine in a jar that isn’t hot.
If you haven’t yet, I suggest you try your Granny’s hand-written recipe. It is the exact same recipe I have followed each year for 50 years. They have earned a thumbs-up from everyone I have given them to.. To me, they taste so much better than any other recipe I have tried.
Thanks, Iris. I have tried them and we love them too. That’s so interesting that it’s the same recipe you have. It’s certainly a winner.
Do you cut or crush the cloves of garlic when adding to bowl. Just wondering how you ensure you get the same amt in each jar when filling jars. Do you make sure you have at least one clove in each jar?
Thanks
Hey Karen, I’m not that exact. I usually just put them in with everything else and however many get into a jar is how many get into a jar. However, you can certainly crush them or make sure each jar has the same amount of garlic cloves.
If I choose to pressure can, how long do you recommend?
I don’t. There are no recommended times for pressure canning pickles. If the issue is that you don’t have a pot deep enough to cover the jars with water by one inch, you can use your pressure canner for water bath canning. Just don’t lock down the lid. There should be instructions in the booklet that came with your pressure canner.
First year canning pickles…. love this recipe!!! I’m on my third batch of pickles in the last two weeks. Today I added sweet banana peppers to the recipe.
Thank you for this recipe!!!!!!
Thank you, Julie! I’m so glad you like it and I bet banana peppers are going to be a great addition.
What can I do with the excess brine?
You can use it for things like deviled eggs, chicken or tuna salad. You can also just add some fresh cucumber slices to it and put it in the refrigerator for refrigerator pickles. Or use it in salad dressings or to marinate meat.
These are so good. I’m on my second batch. Everyone eating them as fast as I can them
Awwww, that makes me happy! Thanks for sharing.
Yummy! Wish I had made more.
Glad you like them, Marian!
I have been using this same recipe since I started canning at about 12 years old. My Dad was stationed in Vietnam and with 7 kids my Mom went back to work. So I took over the canning. I had been helping for years. This recipe is perfect for B&B pickles. I use pickling cucumbers and also plain old cucumbers from the store when Cheap.
My question is I made to much pickling liquid and out of cucumbers. Wondering if I could replace the cucumber for carrots. I was given about 10-12 of carrots it just sounds good.
Thank you for keeping this wonderful art of canning alive.
Kathleen, that is so fun! I love hearing that others are using the same old-fashioned recipe that my Granny used. Funny how recipes were passed around just fine before the internet…lol. Yes, I bet it would make a lovely brine for carrots. Canned pickled carrots need to be processed for 15 minutes (adjust for altitude if necessary). I’d love to know how they turn out.
Awesome recipe thank you
You’re welcome! I’m glad you like it….so would my Granny!
How long do you leave them set before opening for the first time?
Ideally, a couple of weeks. But we never wait…lol
How many pints does this recipe make?
4 pint jars
If I have a 24 ounce jar and boiled them for 15 minutes is that long enough? I might have started the timer before the water returned to a boil.
They need to go into the refrigerator if the timing was started before the water was at a boil.
Made 4 quarts of these pickles and they were fantastic. I gave 3 jars away and I have devoured the last jar.
I’m so glad you like them!!! That would make my Granny happy!!
My great aunt used to make the best B and B pickles but added cauliflower. Those and the onions were my favorite parts. Tomorrow I’m using your recipe to make B and B cauliflower and onion pickles. No cukes.
Can’t wait to try them!!
Yum!
Is it a good idea when making pickles to add alum to your brine?
Some people do to help their pickles stay crisp. I’ve never used it, I just put grape leaves in my pickles, so I can’t speak to whether it’s a good idea or not.
I doubled the recipe because this is my daughter in laws favorite pickle. These are absolutely amazing. I don’t even like pickles and even I think these are great.
I’m so glad you like them! What a sweet thing for you to do for your daughter in law!
Hi there! I am very new to canning. What kind of onions do you use for this! I can not wait to try this recipe!
You can use white or yellow, it really doesn’t matter. Thanks for asking.
I’m confused about the towel and the ice?!?!?!
The towel goes on top of the cucumbers and ice on top of that? Is that right? Do I replenish the ice?
Yes, the towel keeps the ice from being directly on top of the cucumbers. No need to replenish the ice.
Batch made 4 1/2 pints. It says to rinse lightly. I will rinse a lot more next time. Good flavor. Definitely a do over!
I absolutely 💯 love these pickels.
What a nice and easy recipe. Thank-you for sharing
Love these pickels, they turned out so good!
Love this recipe, I have used it multiple times. I was wondering if you could do green beans instead of cucumbers though?
Yes, you can.
Can you tell me how long do they last
The USDA recommends that home canned food be consumed within 12 months of canning because the quality will start to deteriorate after 12 months. That being said, as long as the jars are sealed, the pickles are safe to eat.
After water bath do the pickles stay a little crisp or are they soggy?
If you use fresh, small cucumbers and do the ice bath, they will be a little crisp – not as crisp as store bought pickles but not soggy. Traditionally, bread and butter pickles are not as crisp as dill pickles.
Can you use a sugar substitute?.
I’ve never used sugar substitutes, so I can’t speak to that. If you want to try it, this article might be helpful, https://extension.psu.edu/canning-with-less-sugar
I tried making the bread and butter pickles the other day / mine are too salty/ I must have used the wrong salt or to much salt. Is there any way to get some of the salt out of them? I’m also on a salt reduced diet. Any ideas? Thank you.
Hi Melvin, I’m sorry to hear that. I don’t think that after pickles have been made, there is anything you can do about the salt. I’m wondering if they weren’t rinsed well before being added to the brine? My husband is on a low salt diet and many times he thinks something is super salty and the rest of us don’t. I’m assuming it’s because he just isn’t used to salt anymore. I’m sorry I couldn’t be of more help.
OMG. This recipe is great. I had so many cucumbers 🥒 this year, so I had to can them. This recipe reminds me of my Grandmother’s bread and butter . I would eat the whole jar.
This was my first year trying to pickle cucumberr. I absolutely love this recipe. They taste great and are easy to make.
So glad to hear you love them!!!
Do the jars have to be warmed first or just put in the bath
The jars should be hot when you pack them with the cucumbers and hot brine to avoid thermal shock. Once they’re filled, just put them in the hot water bath.
I love your Grandmother’s recipe. I put cloves in the vinegar liquid and it tastes just like my mother’s used to. Thanks for the recipe.
Goodness, this makes me so happy! Thanks for sharing!
Tried this bread and butter recipe I won’t be trying any others this one was perfect making my second batch now only 1 grt jar left now I need to make pickle relish
Thank you so much for letting me know you like it! My Granny would be tickled.
Bread & butter pickles, along with pickled eggs (yes, yes, Ohio born, Amish country nearby…long ago and now far away) were divine summer staples. So thank you, first for this recipe! Also, we had a true ‘summer kitchen’ in one room of the basement; shelves were stacked high with home canned veg’. Fascinated me as a child, and now in the era of processed foods I am even more grateful for continuing to cook at home, from scratch. Sorry for going on a bit.
Question: can I simply make these and store in the fridge for a few weeks w/o canning?
Cheers for getting back!
Victoria
My granny had a room like your summer kitchen! It was amazing. Yes, you can make this recipe and store in the refrigerator.
Can you use all ACV? I just noticed my white is only 4%🥴
Yes, but the flavor and color will be different.
Would you use Pickle crisp in this recipe and if so, how much do you suggest?
I’ve never used pickle crisp for my pickles so I can’t recommend an amount. I’m assuming there are recommended amounts on the pickle crisp jar.
Little bit of confusion is created in this recipie. I the center part where it talks about crisp bread and butter pickles it has pics and instructions of putting salt on the ice that is in the towel NOT on the cucumbers. In the recipe is says put the salt on the cucumbers and a towel with ice on top of them. Can you clarify please.
Thanks for catching this. The first photo has the salt on the cucumber and onion slices just like it says to in the recipe, but the wording under the second photo is confusing. I’ve corrected it.
Do you need any water for the brine?
Nope. This is a vinegar only brine recipe.
What if you don’t have a canner. Can you just due process and leave out the water bath 8n the canner.
I will update the post. But in the meantime, the process is pretty much the same. Once you fill the jars and put the lids on, let them sit on the counter to cool and then store in the refrigerator. Even if the lid pops and “seals” it is not shelf stable unless you process them in a boiling water bath canner. If you don’t have a canner you can use a large stockpot and put some rings on the bottom to lift the jars off the bottom of the pot. The pot needs to be big enough so that water will cover the jars by at least 1 inch and can still boil. You don’t necessarily need a canning pot.
I don’t have garlic. Can I use minced garlic from a jar or garlic powder??
You can leave it out or use garlic powder. I’m not sure what all is in minced garlic from the store but if it’s just garlic, you can use it. If it has oil or anything else in it, you can’t use it.
How much of the salt gets sprinkled over the ice and how much salt goes in the brine? The is not clearly stated. Thanks
All of it is sprinkled on the cucumbers and none goes in the vinegar brine.
Love this recipe!! My husband is not a fan of garlic so I left that out of this recipe and they turned out fantastic!! My favourite pickle recipe so far!! Thanks for sharing😊